How To: Get Dolby Atmos on Your OnePlus 6T for Enhanced Audio
The OnePlus 6T is easily one of 2018's best value phones for many reasons, especially when it comes to rooting and modding. But like many new phones, it's plagued with the single bottom-firing speaker that left us wanting more in the sound department. The speaker is decent on its own, but it appears to have some hidden potential at the same time.By utilizing the Dolby Digital Plus Magisk module by repey6, you can turn your decent speaker into one that punches well above its weight. This works for both the phone speaker itself and your headphones as well. No complicated setup here — just a few quick settings and you're good to go! I'll show you how to configure this module and share two great profiles I'm using to enhance your listening experience.
RequirementsOnePlus 6T unlocked bootloader TWRP installed root access Magisk installed
Step 1: Download the Dolby Digital Plus ModuleBefore you can begin enhancing the audio on your OnePlus 6T, you will need to download the core module to make this whole thing work. There is one main file you want to download, which is the core module itself.Download Dolby Digital Plus Module Once you have downloaded the file from above, make sure it is located in the "Download" folder on your phone. If you're using a computer, go ahead and mount your phone then transfer the file over to your internal storage.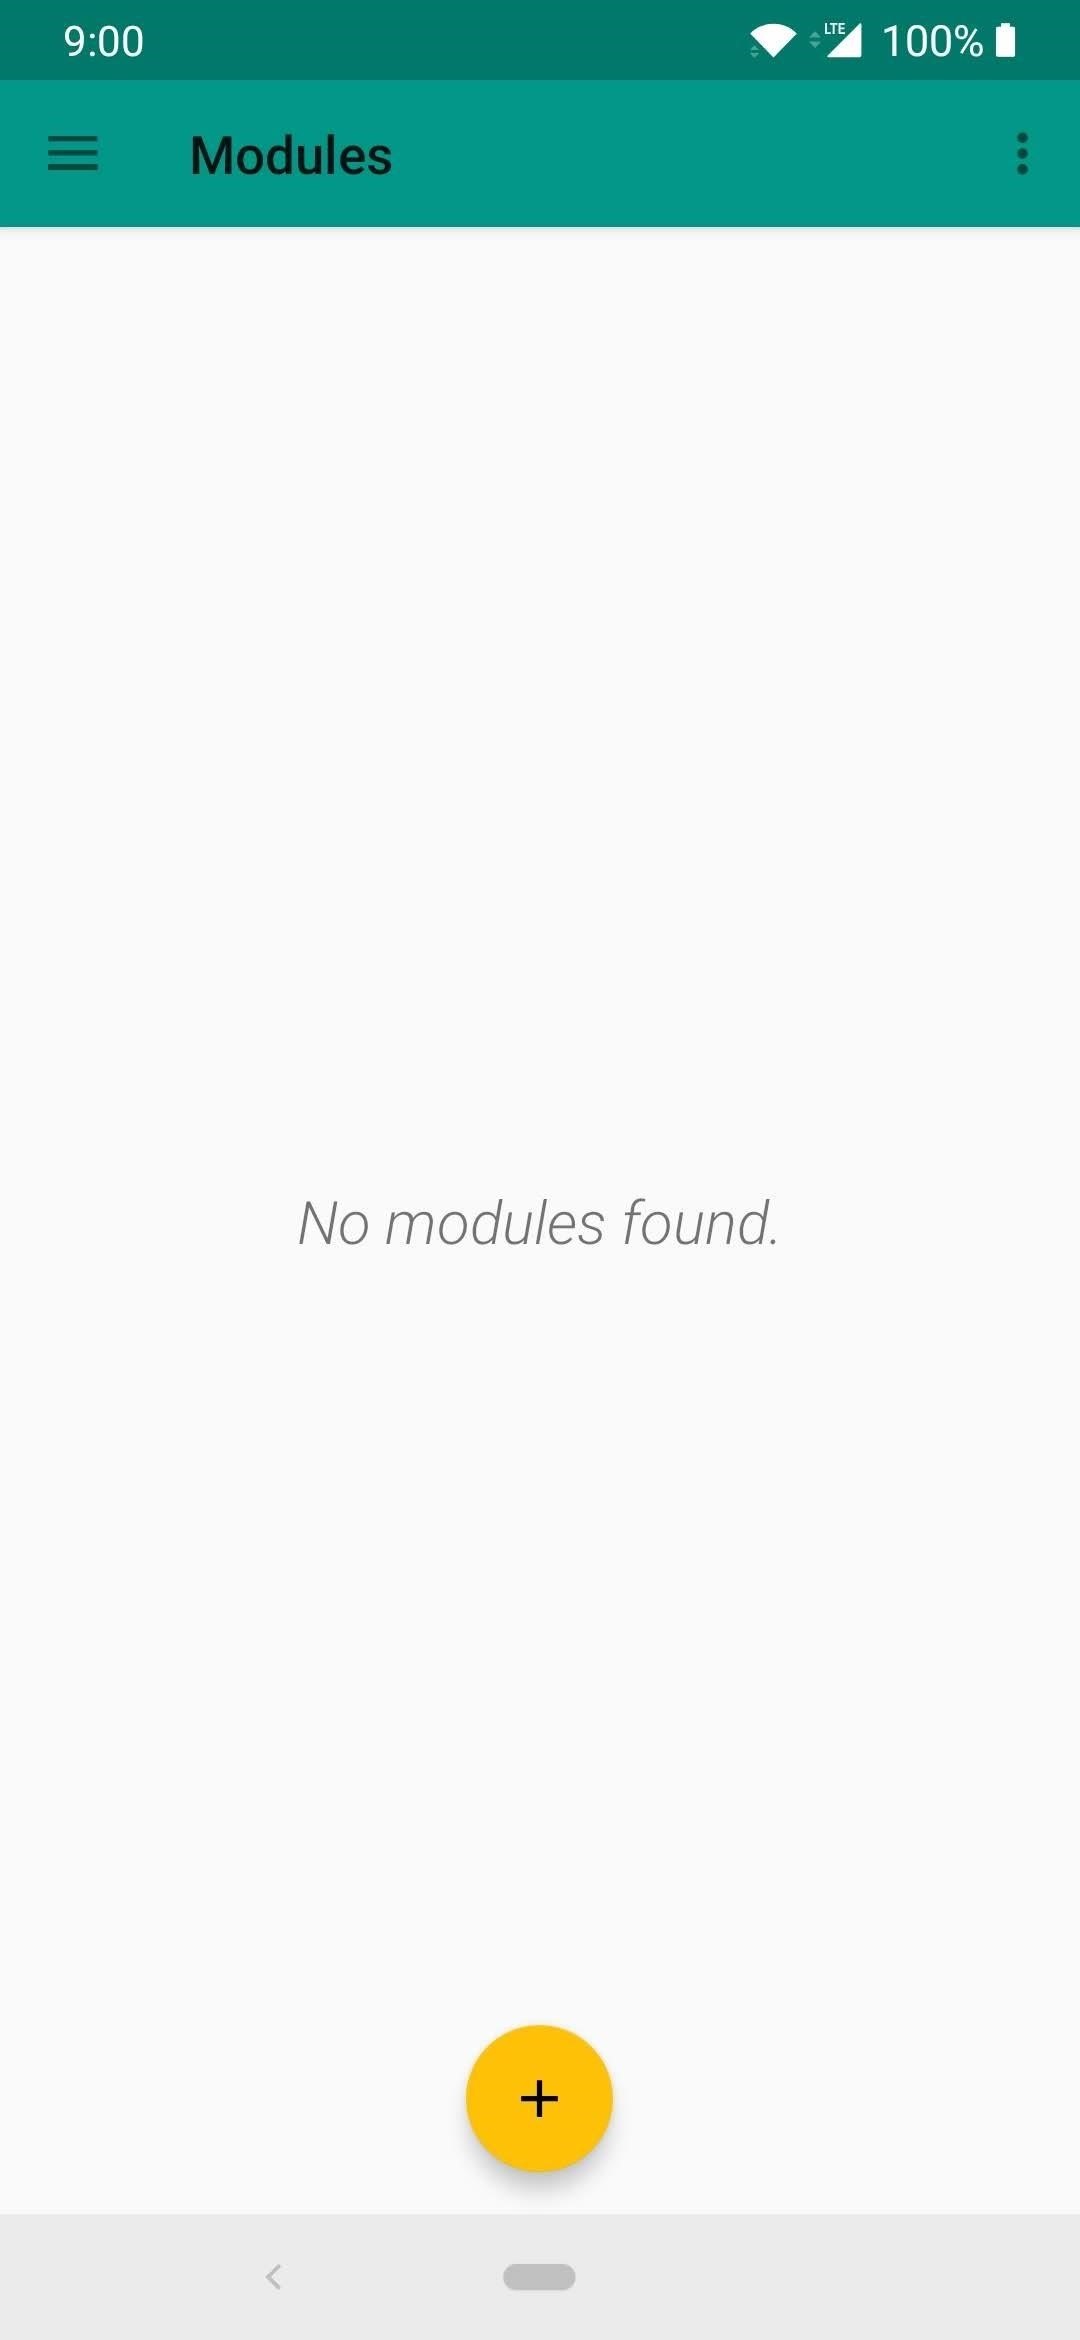
Step 2: Install the ModuleNext, you must open the Magisk Manager app so you can begin flashing the file onto your device. From the main screen on Magisk Manager, tap the menu icon on the left, go to "Modules," then tap the plus sign button at the bottom. From there, navigate to the "Download" folder (or the location you stored the module file), followed by tapping the main installer file. It will begin installing the module, and once it finishes, tap the "Reboot" option to proceed.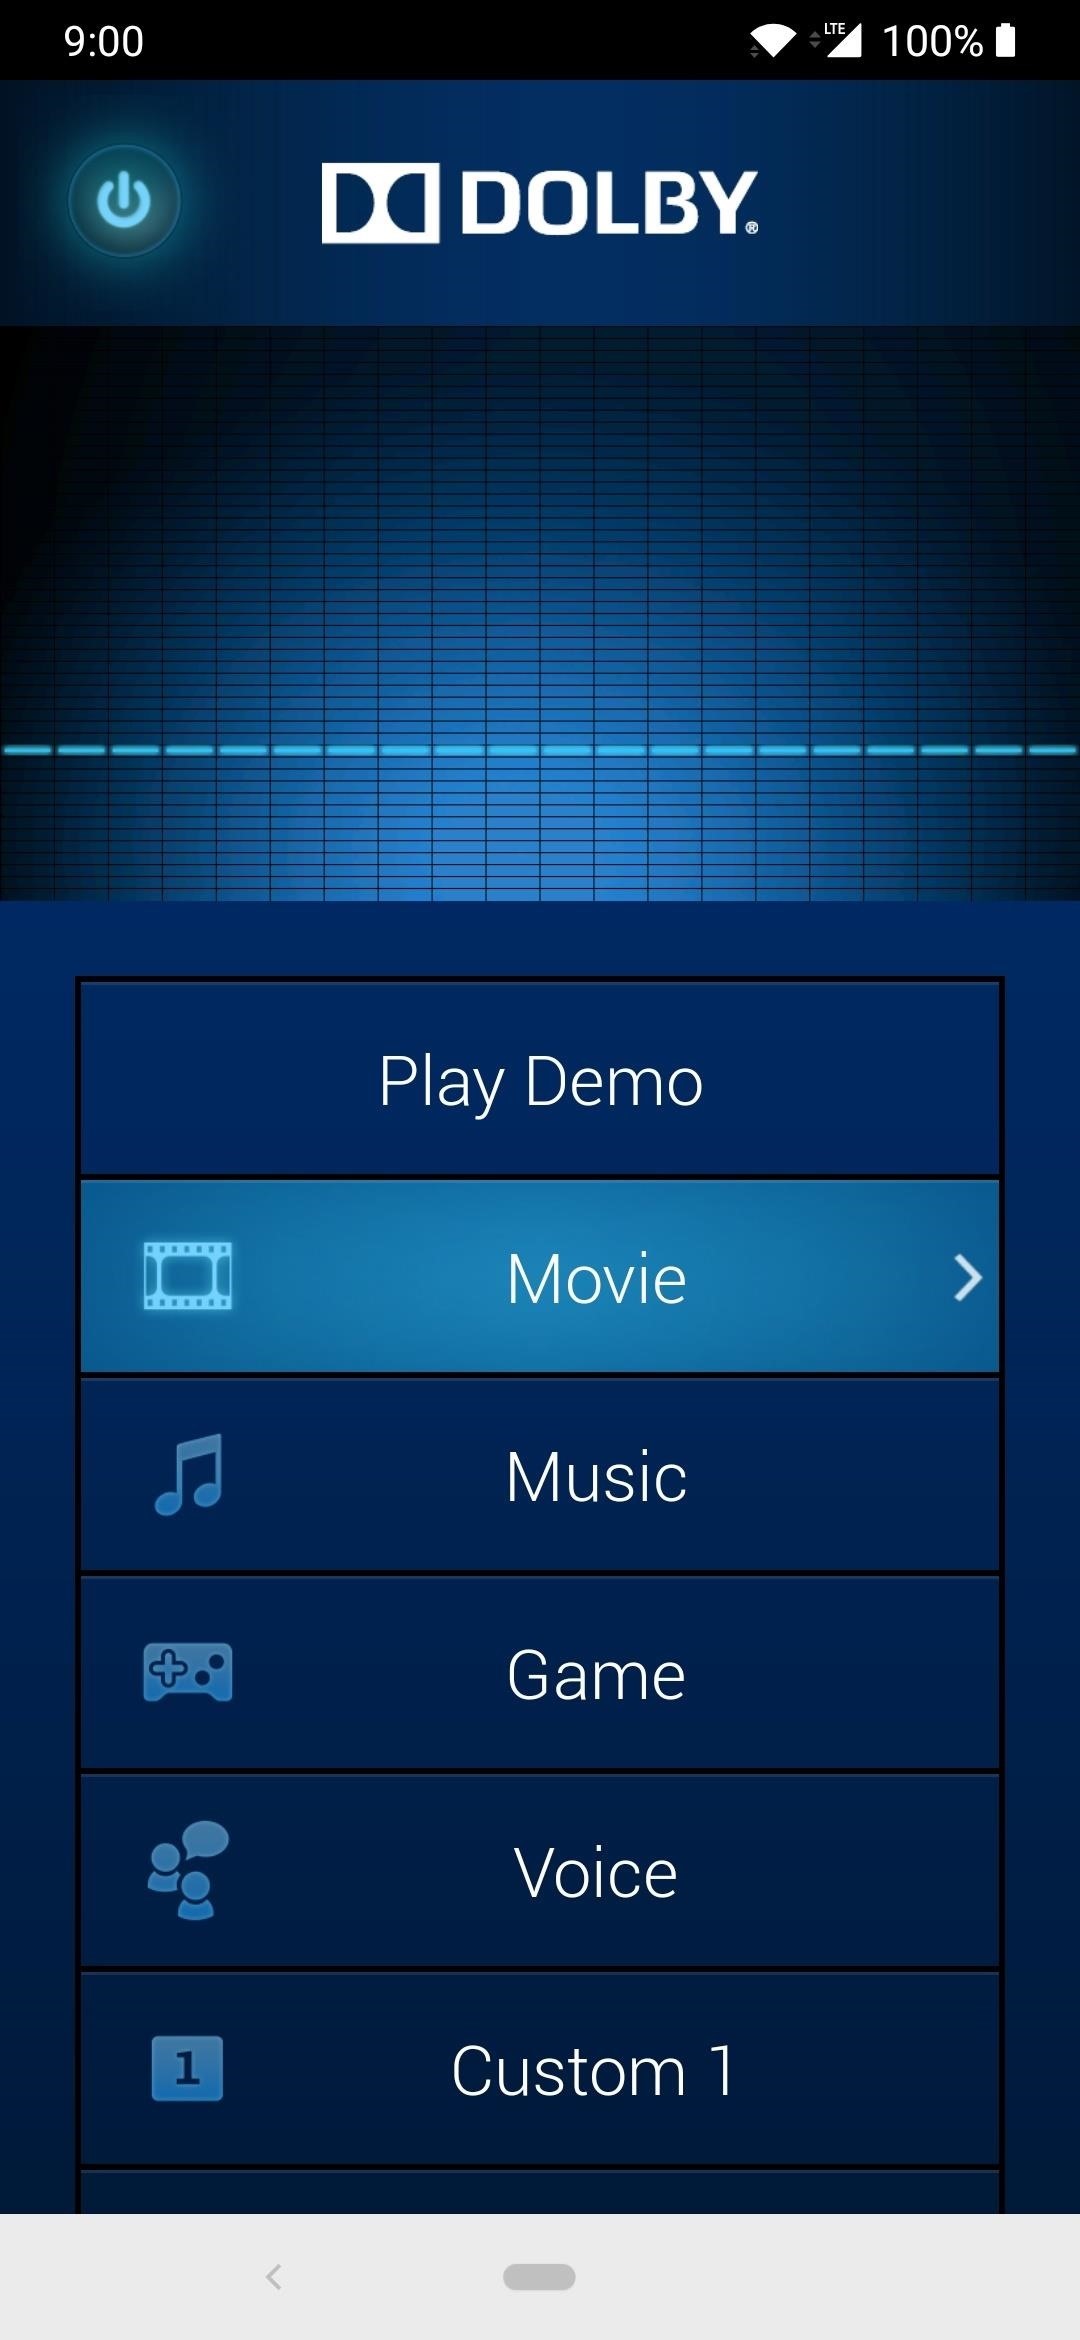
Step 3: Open the Dolby AppNow that you are back up, head into the app drawer of your home launcher and you should find a newly installed app called "Dolby." Open the app and then make sure your media volume is low before proceeding. The normal volume level you are used to will be changed, so that's something to be aware of while using this module. I'll go over the main screen and some of the things you will see in the section below. Play DemoTypically, you would be able to hear a sample song to test the sound settings, but it appears this option is broken right now. Don't worry about it; you probably won't need it anyway.MovieWhen you want to watch movies, this option should make the vocal audio stand out more than usual while maintaining some bass for good sound effects.MusicWhile listening to music, this option should make the audio a bit more punchy with slightly increased bass to enhance the audio.GameThis setting can be used for a variety of things since it amplifies the overall volume quite a bit. Your audio can get quite loud rather quickly so be aware of that when selecting this option.VoiceWhile watching videos on YouTube or listening to podcasts, this option will specifically cut out the bass and bring the vocals to the front, which makes it easier to hear the speaker.Custom ProfilesYou have two custom profile options (Custom 1 and Custom 2) where you can tweak the audio settings and make one for yourself. You can use the example profiles from Step 5 or do some experimenting to see what sounds the best to you.
Step 4: Learn the Audio BasicsWhen you tap any one of the profiles within the app, you will be presented with a new screen with multiple options to choose from. I'll break down each option and briefly explain what they do in the section below. Volume LevelerUsing this option is not recommended for daily use, but when enabled, it will amplify the system volume level to make the audio very loud. Might be useful for certain situations, but feel free to try it for yourself to see if it's something that might work for you. I personally keep this specific setting disabled and use a custom equalizer profile instead.Dialog EnhancerTurning this option on is especially useful for listening to music with vocals, as it tries to enhance the quality of the vocals by making them more clear. It can sometimes overcompensate itself and make the audio loudness fluctuate a little bit, so it might not sound consistent in all cases. With my custom profiles, I had this effect on both the speaker and the headphones, which is why I left the option disabled. Feel free to test it out for yourself and see how it sounds with your music.Surround VirtualizerThis will simulate virtual surround sound in your headphones and may or may not be useful to you. Some people like the effect from this kind of software virtual surround sound while others prefer the original untouched audio. Try it with and without the option enabled to see what works best for your listening experience on your own set of headphones.Intelligent EQThere are three preset profiles you can default to if you like the way they sound and don't want to mess with the manual Graphical EQ settings.Focused: This will narrow the audio path and will concentrate the sound to a much smaller area. Rich: This will enhance the audio with more bass and treble, making the audio stand out more. Open: This will widen the audio path and will concentrate the sound to a much larger area. Using any one of these default profiles will slightly enhance your stock listening experience for both the speaker and the headphones without any extra adjustments on your part.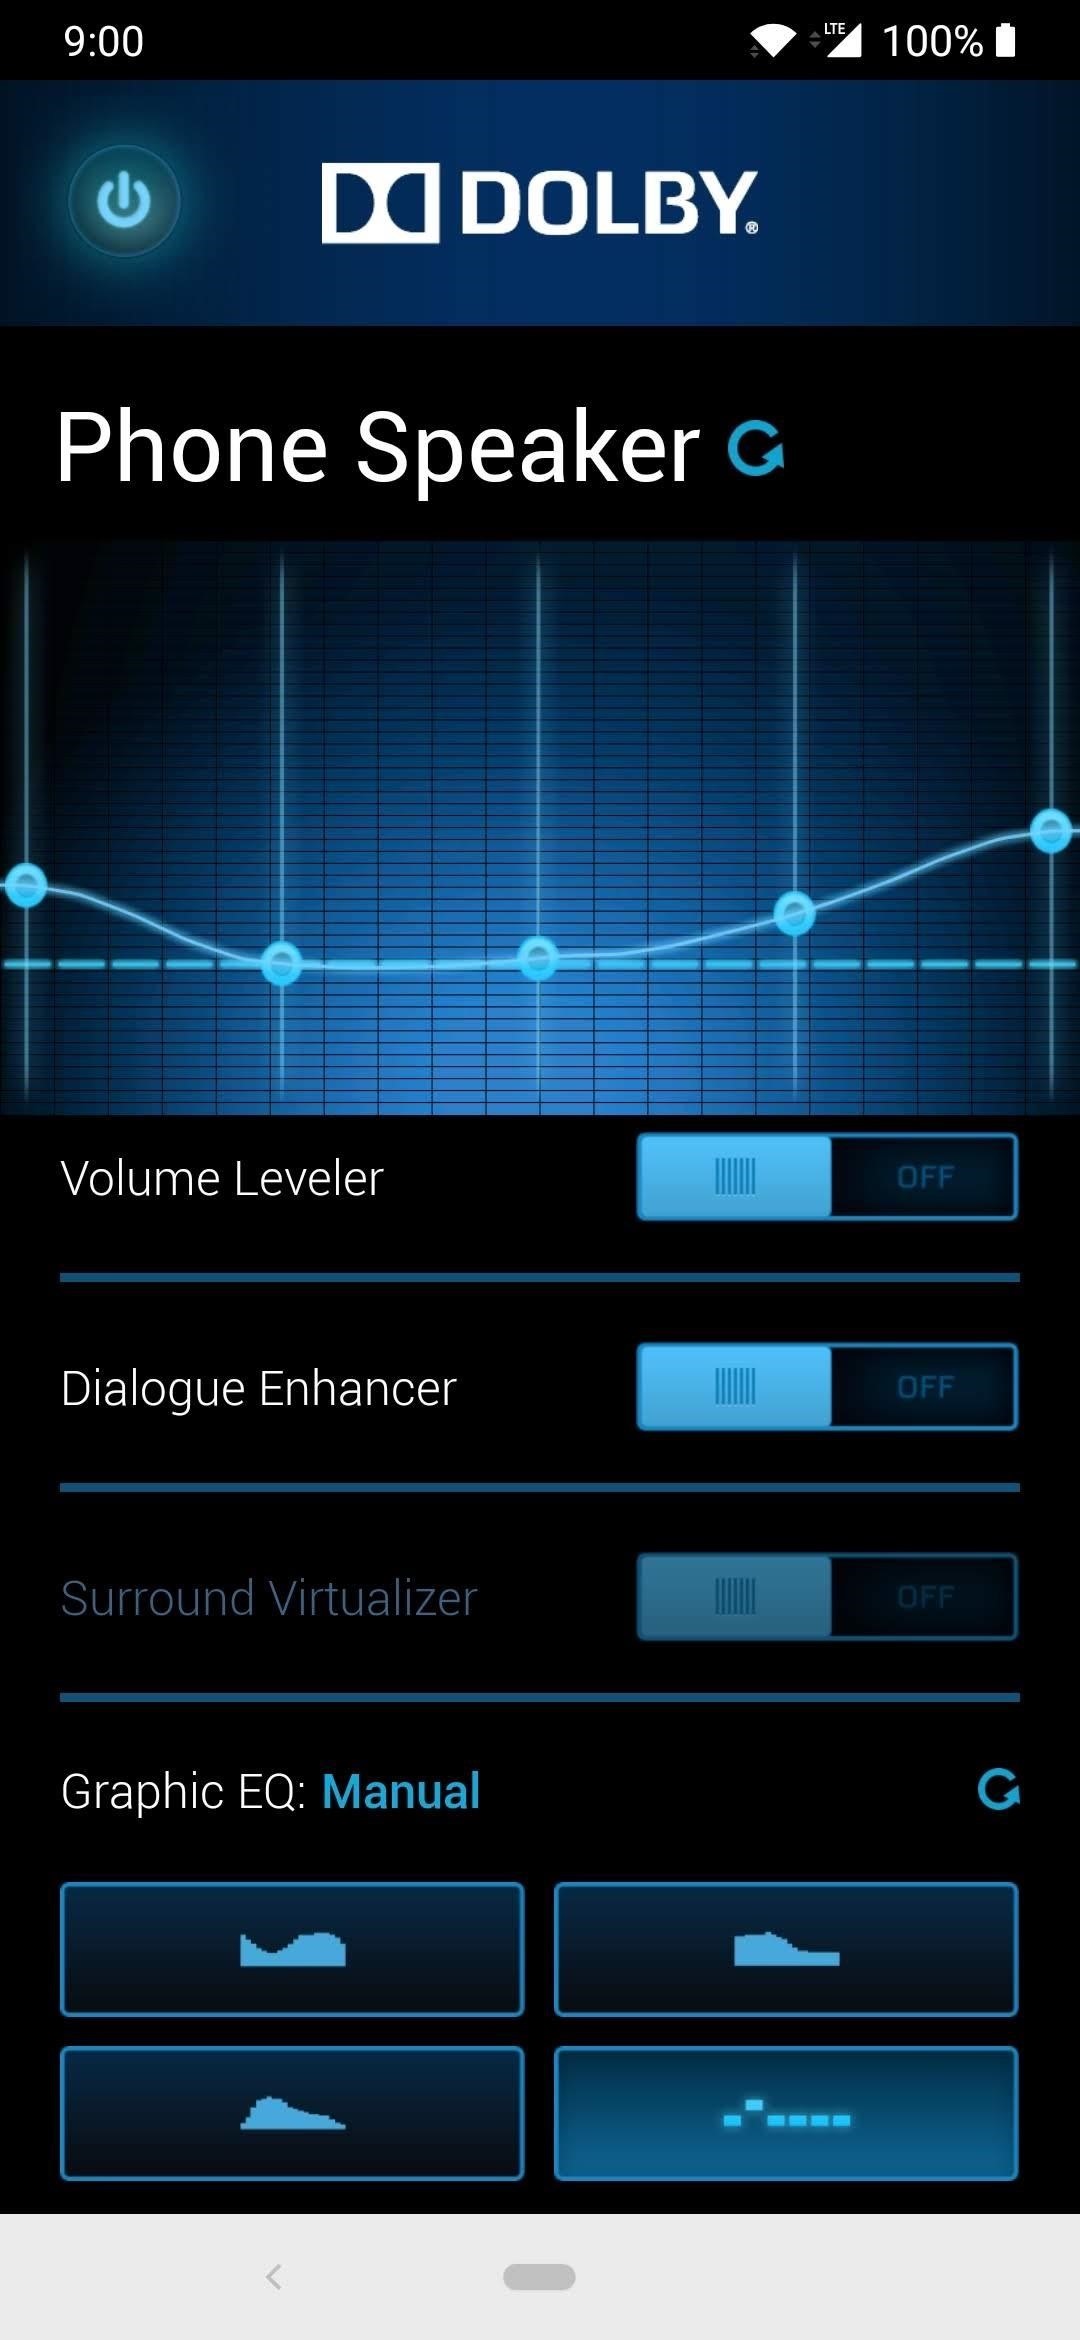
Step 5: Customize Your Listening ExperienceIf the default profiles are not enough for you, I've got you covered! The first profile I want to share with you is going to be for the phone speaker. From the main menu of the Dolby app, Tap the "Custom 1" section to get started with a custom profile. Long-press the profile name at the top and rename it to "Phone Speaker." The second profile will make your headphone listening experience much more rich than what you are used to hearing. Repeat the same step from the previous profile, but rename the second profile to "Headphones." Then all you have to do is make sure the "Graphic EQ: Manual" tab at the bottom is highlighted so you can get the manual adjustments for the 5-band equalizer. Use the screenshots above to drag the sliders for each band on your device to match as closely as possible to the profiles I have provided.You can use these profiles as a good starting point or as your daily driver — you can't go wrong with either one! There is no right or wrong answer since we all have different preferences when it comes to how we like to listen to our music. Have fun with your new sound and feel free to do a little experimenting if needed with any of the settings.Note: If you want to uninstall this module, head back to the "Modules" section on the Magisk Manager app from Step 2, then tap the trash can icon. You will have to reboot your device after that to completely uninstall the module. Don't Miss: The Best Phones for Rooting & ModdingFollow Gadget Hacks on Pinterest, Reddit, Twitter, YouTube, and Flipboard Sign up for Gadget Hacks' daily newsletter or weekly Android and iOS updates Follow WonderHowTo on Facebook, Twitter, Pinterest, and Flipboard
Cover image and screenshots by Stephen Perkins/Gadget Hacks
How to Start using your new Samsung Galaxy Tab with - Tablets
So, this is how to speed up Galaxy Note 8. Perform all the above steps one by one and you are bound to face some noticeable improvements in the overall performance. See Also: Top best games to play on Galaxy Note 8
5 Common Causes To Laggy Android Devices (And How To Fix Them
How to stop apps from tracking you and accessing your data in Android using App Permissions, a new feature Google released in Android Marshmallow 6.0. Category Science & Technology
There is a Secretly Way to Track An Mobile Phone Without Them
• Log in you Facebook account. • Go to Edit My Profile tab below your profile display picture. • There are different tabs for editing information. • Basic information tab consists of
How to change Facebook profile picture without notifying anyone
4 handy options for adding storage to your iPhone or iPad but overall the experience isn't bad. The device also doubles as a external battery with a capacity of 4,640mAh for charging
iPhone or iPad Full? Try These 4 Ways to Expand Its Storage
Buy HTC Screen Replacement & Repair Kits at the Mobile Parts Leader. Ships Today! High quality HTC screen, glass, LCD display parts. Fix your screen & save.
Find Repair Lcd Screens on eBay | Seriously, We Have Everything
AD
Instantly Unlock Your iPhone with Face ID — No Swipe Needed
How to Use the media keys on a BlackBerry Pearl 9100 or 9105
How To: Monitor Cellular & Wi-Fi Data Speeds from Your Samsung Galaxy Note 2's Status Bar or Notification Tray How To: Get the S5's New Rounded Quick Settings Toggles on Your Samsung Galaxy S3 How To: Disable the Missed Event Widget & "Blocking Mode On" Notification for the Galaxy Note 3
Control Volume Directly from the Notification Tray in Lollipop
One of the more talked-about features of Google's new flagship device is the fact that all of the data on the Nexus 6 is encrypted by default. At face value, this certainly seems like an added bonus for the 6-inch phablet, especially in this day and age with growing security concerns abound.
You can see that the screen of your iPhone X become unresponsive sometimes. You are using your iPhone X and it suddenly wholly stops to give a response to your taps, or there is a big delay between the responsiveness of your taps and screen output. There may be various reasons behind such unresponsiveness of the screen in your iPhone.
Calculator App Missing from Control Center in iOS 12? Here's
If you are editing or viewing a Google drive file and suddenly internet connection is gone, you can still view and edit. This video will show you how to view and
How to Enable Google Docs Offline Edit Mode in Google Drive
There are three basic reasons for this: (1) Not using a note taking app to draft captions, (2) Leaving spaces after text or punctuation marks before a line break is to start, and (3) Not copying your draft caption exactly as it is when moving it to the insert caption section of your prospective Instagram post.
Instagram 101: How to Insert a Line Break in Your Instagram
0 comments:
Post a Comment