How To: The Ultimate Guide to Using TWRP: The Only Custom Recovery You'll Ever Need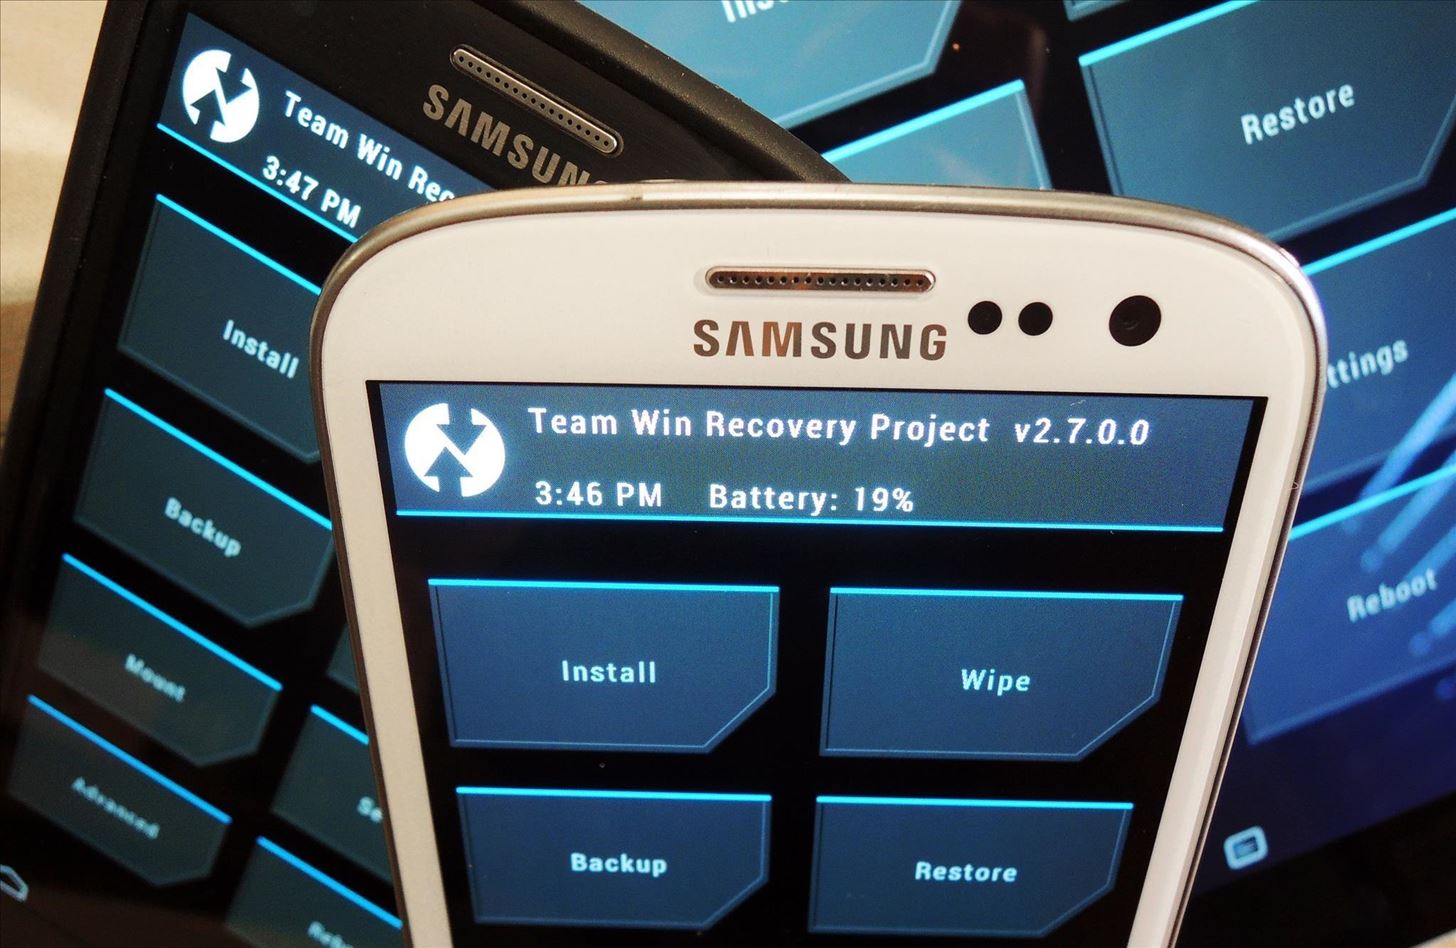
Just the fact that you own an Android device means you're privy to an entire world of third-party development. Many of the mods you'll see here on Gadget Hacks can be performed fresh out of the box, but with root and Xposed, the list grows longer. But to truly be able to take advantage of all that Android's massive development community has to offer, you'll need to have a custom recovery installed.While I can't guide you through installing every custom recovery on every Android device in one article, I can help you learn how to tap the full potential of this powerful tool.This guide is tailored to using TWRP, otherwise known as Team Win Recovery Project, by none other than the TeamWin group. It's the recovery of choice here at Gadget Hacks, due to its widespread adoption and ease of use. The touch-based interface in TWRP makes performing complex tasks a breeze, and many apps and ROMs even tie into TWRP to utilize it as a tool. If you're ready to install the recovery, check out my guide on getting TWRP on your device the easy way, then follow along below to see all this powerful tool can do.
Tip #1. Accessing TWRP's InterfaceThe actual process of booting into custom recovery varies from device to device. If you have one of the more common devices, though, I'll outline the process below.
Google Nexus DevicesTo boot into recovery with any Nexus device, start by powering your phone or tablet completely off. When the screen goes black, press and hold the Volume Down button with one finger. Then, while still holding this button, press and hold the Power button with another finger.This will bring up the Bootloader menu, where you should tap the Volume Down button twice to highlight Recovery Mode. From here, simply press the Power Button once to confirm your selection, and recovery should come right up.
Samsung Galaxy DevicesFor any Samsung Galaxy device that has a physical Home button, booting into Custom Recovery should be the same.Start by powering your Galaxy completely off. When the screen goes black, press and hold the Volume Up, Power and Home keys simultaneously. This will take you directly to your custom recovery.
HTC One (M7 or M8)Before you begin, make sure Fast boot mode is turned off. To do this, head to Settings, then Power, and make sure the box next to the Fast boot option is not ticked.Then, power your HTC One completely off. When the screen goes black, press and hold the Volume Down and Power buttons simultaneously. This will bring up Android's bootloader menu. From here, tap the Volume Down button once to highlight the Recovery option, then tap the Power button to confirm your choice.
Software MethodsAll devices, if rooted, can utilize various software options to enter recovery from within Android. I've previously highlighted some of these options in this tutorial. While the article is geared toward a Nexus 5, all options listed should work just fine on all of the above-listed phones and tablets.
Tip #2. Making a NANDroid BackupFirst and foremost, when using custom recovery to install various hacks, you should always have a backup handy in case things were to go awry. This is called a nandroid—"NAND" as in flash memory, and "droid" as in Android.TWRP has made this process about as simple as it gets. From the home screen, simply tap Backup to begin. From here, leave all the options ticked just as they are, and swipe the slider at the bottom to create your backup. This will create a set of image files that function as a snapshot of your device's current setup. If you ever need to restore this backup, every tiny little aspect of your device will be recreated as if nothing ever changed.Because nandroids are snapshots of everything, they can take up quite a bit of storage on your device. For this reason, you may want to consider copying the file over to your computer via USB cable—they will be in your TWRP/Backup folder.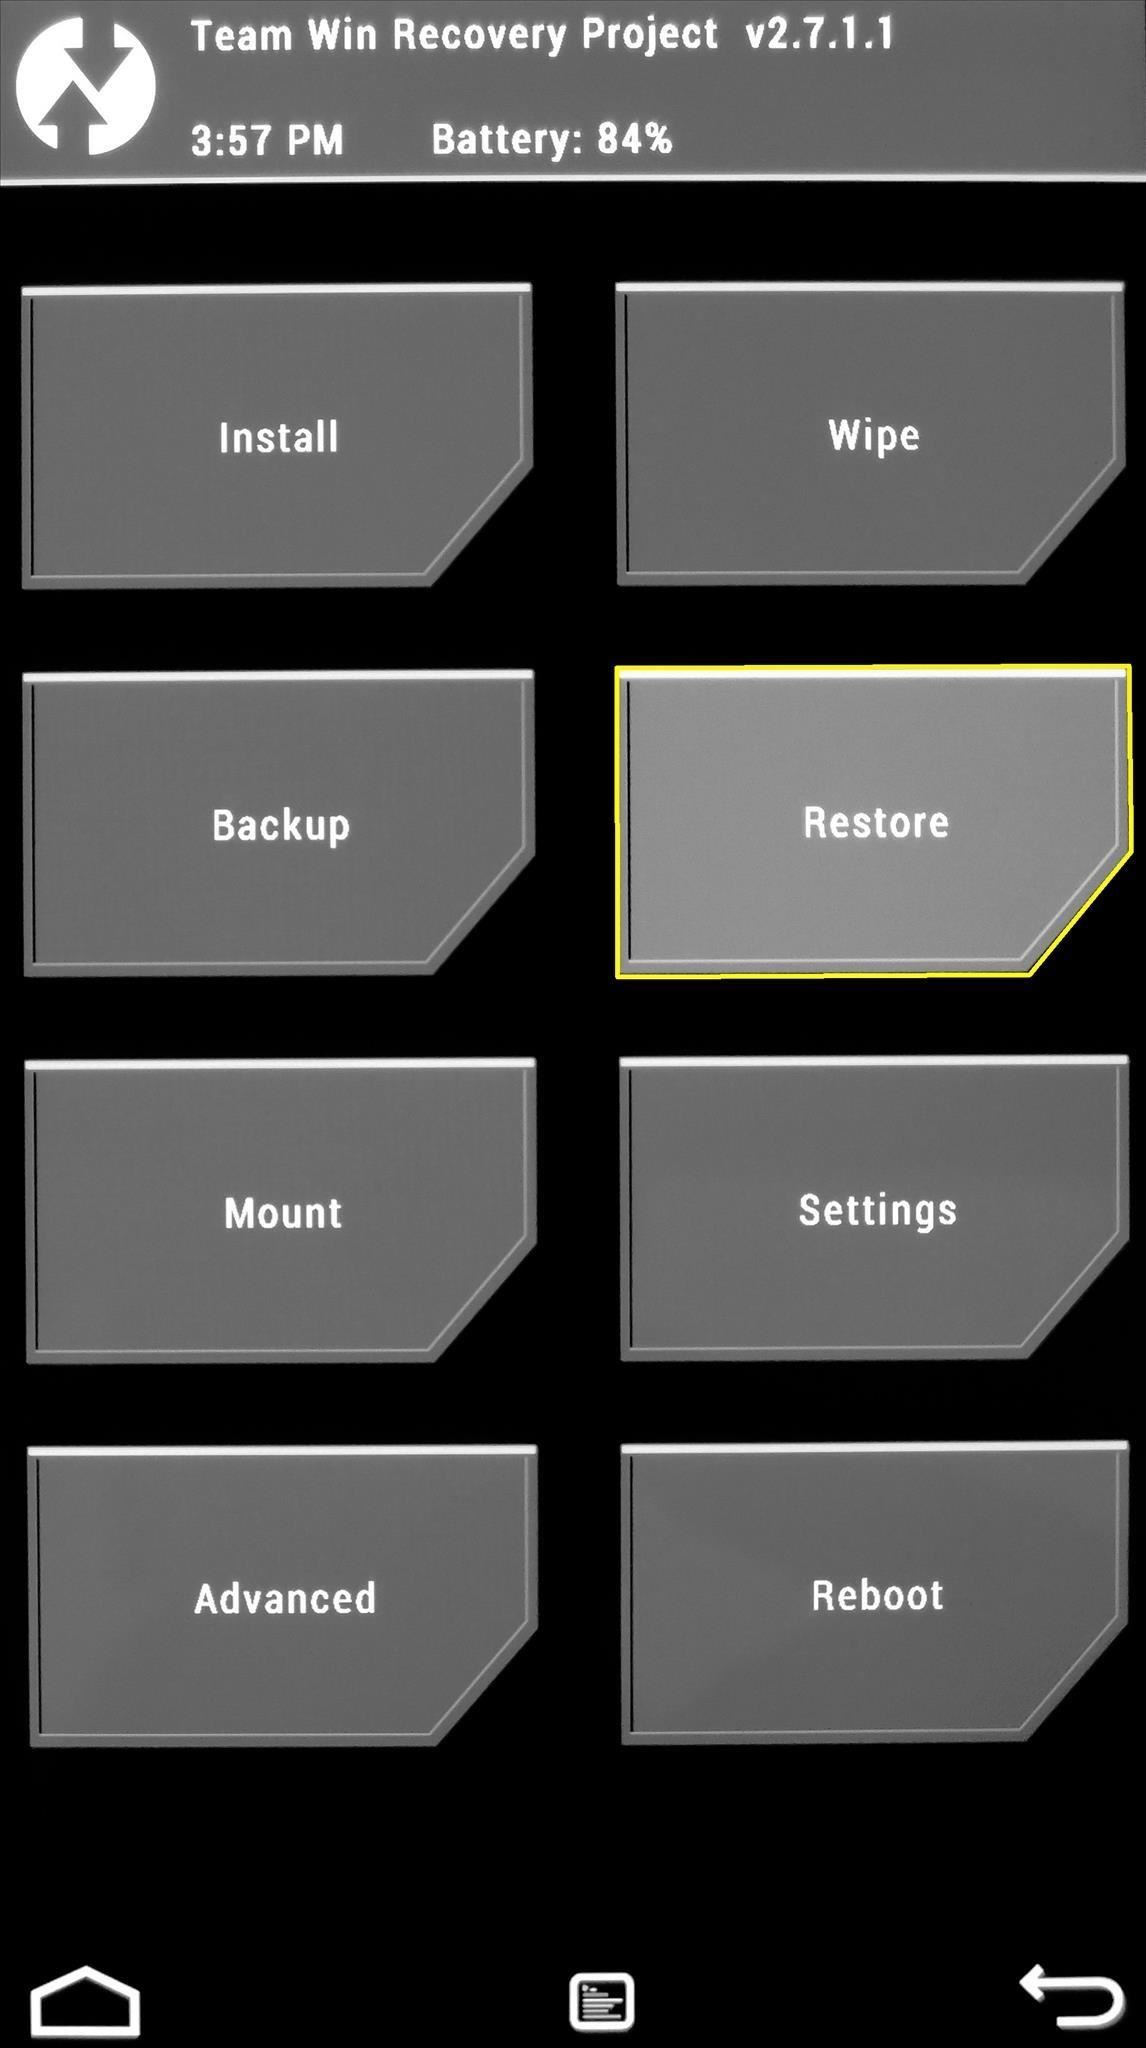
Tip #3. Restoring an Existing BackupSay you've already created a backup and you were tinkering around with a cool mod. But this mod wasn't compatible with your device, and now you can't seem to start Android. No worries, you have a custom recovery installed, remember?From TWRP's main screen, tap the Restore button. Next, you'll be shown a list of all the backups you've made with TWRP. Just tap the one with the most recent date as its file name, and you'll be presented with the available partition images that you can restore. If you copied the nandroid to your computer, move it back to the TWRP/Backup before you restore.Again, it's probably best to leave everything ticked, then you can simply swipe the slider to restore. When the restore process is finished, everything on your Android device will be exactly the same as it was when you created the backup files.
Tip #4. Flashing ZIPsLet's face it, this is the main reason you installed a custom recovery—to have access to all of the hacks that come in the form of a flashable ZIP file. In fact, it's such a key feature of TWRP that it's the very first button on the home screen.To start flashing a ZIP, just hit the Install button on TWRP's main menu. From here, you'll be shown your device's internal storage folder tree. As a rule of thumb, ZIPs that you've downloaded from the internet will be in your Download folder, so head in there. From here, it's just a matter of tapping the ZIP file in question, then swiping the slider at the bottom to flash it.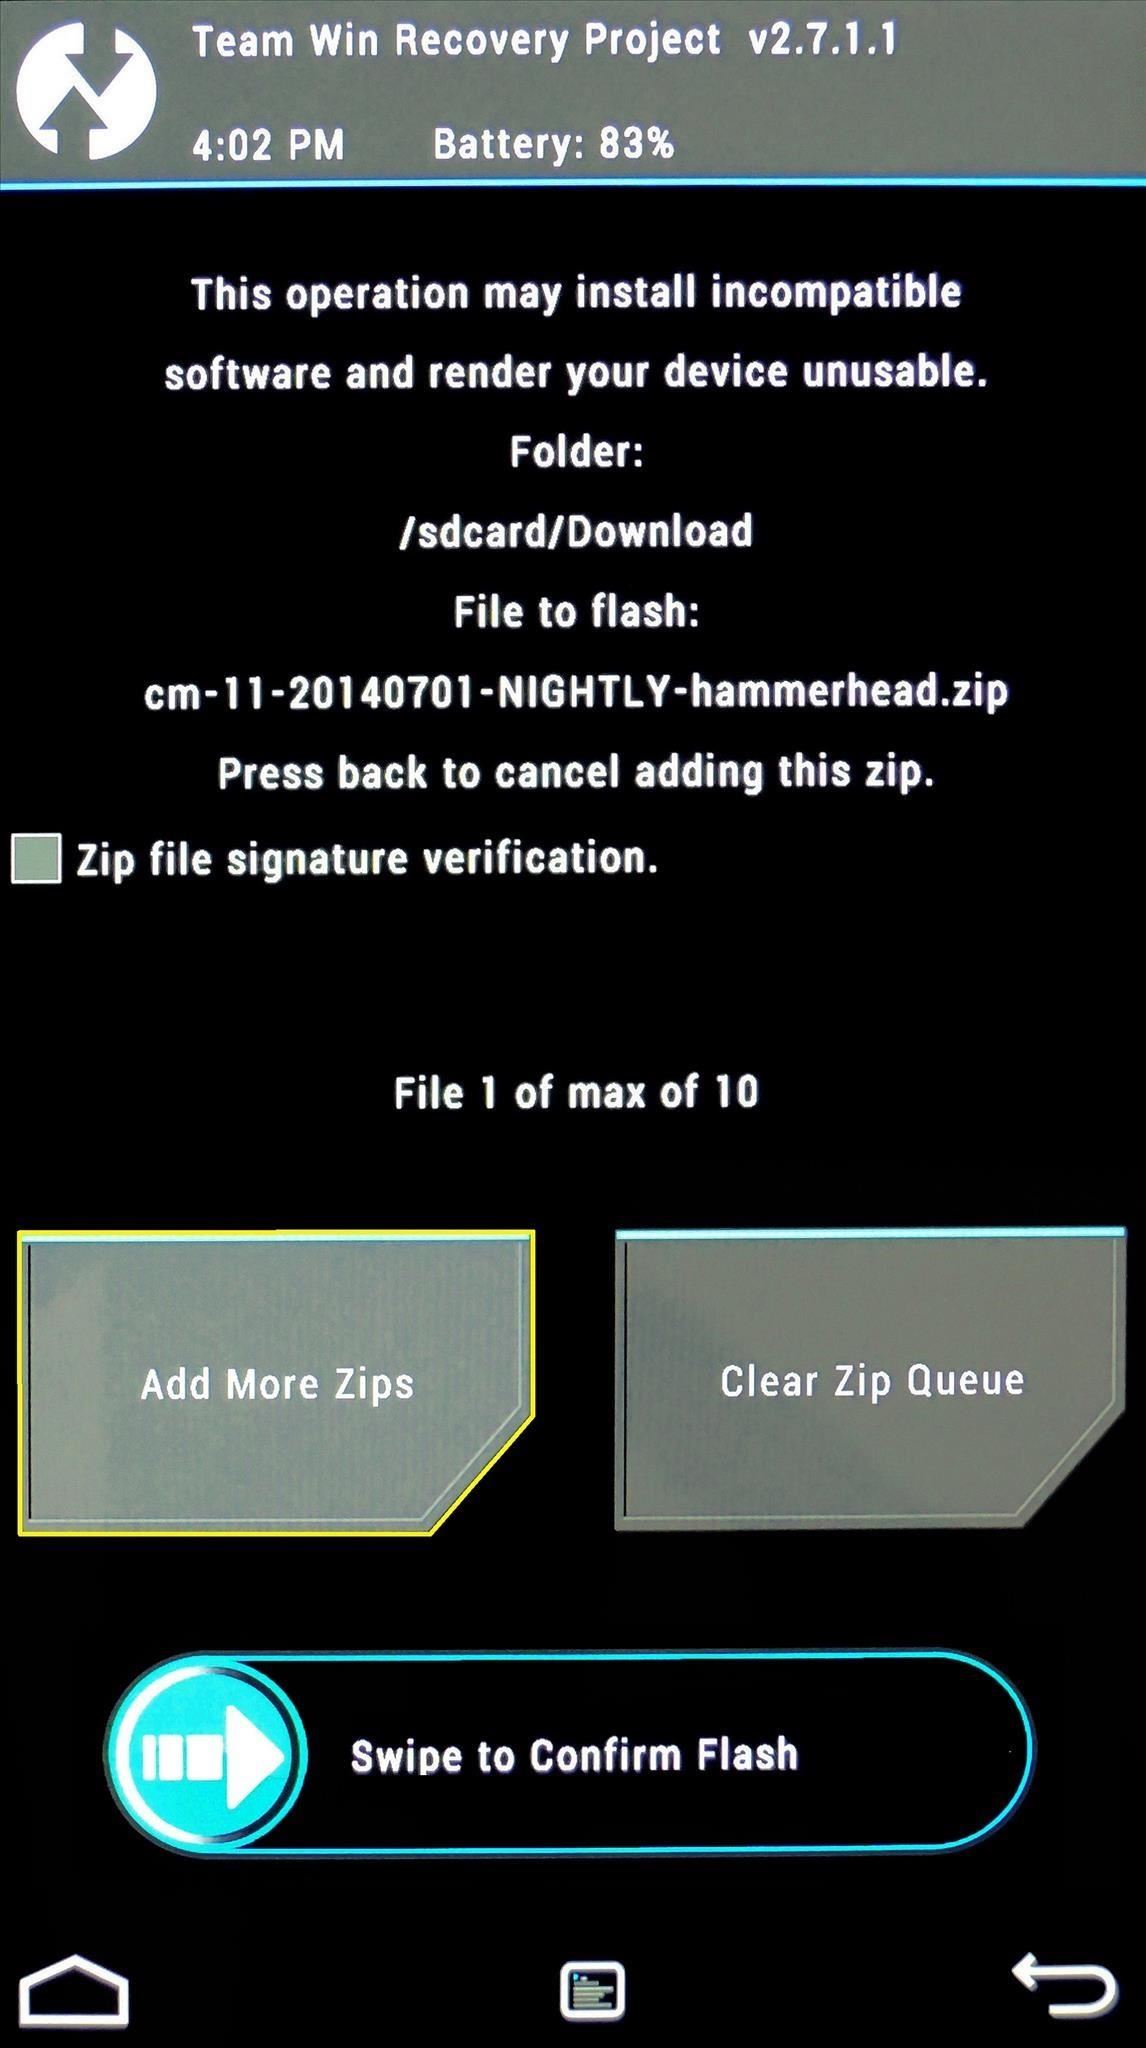
Flashing More Than One ZIP at OnceBut let's say there are multiple ZIPs that you want to flash at one time. This is common with custom ROMs that require a separate ZIP for access to Google apps and such.When you've tapped the first ZIP, rather than swiping the slider to install it, then repeating the process for all the ZIPs in question, simply hit the Add More Zips button. This will take you back to the folder tree view, where you can select your second ZIP. Hit Add More ZIPs again to add a third, and so on. When you're satisfied with your selections, swipe the slider at the bottom, and all of your ZIPs will be flashed in sequential order.
Finalizing the Flashing ProcessAfter installing a ZIP file, TWRP gives you a few options: Home, Wipe Cache/Dalvik and Reboot System. The first option takes you back to TWRP's main screen, and the third option should be self-explanatory. The second option, Wipe Cache/Dalvik, is one that should be noted.Android accumulates various bits of data as you continue to use it. Sometimes, this data is specific to your current setup. Certain mods will cause conflicts between the new functionality they bring and the existing data on your device.Most mods, however, will not cause a conflict with this data. But when in doubt, wipe it out—simply tap Wipe Cache/Dalvik after flashing a ZIP, then swipe the slider at the bottom to remove any potentially-conflicting data.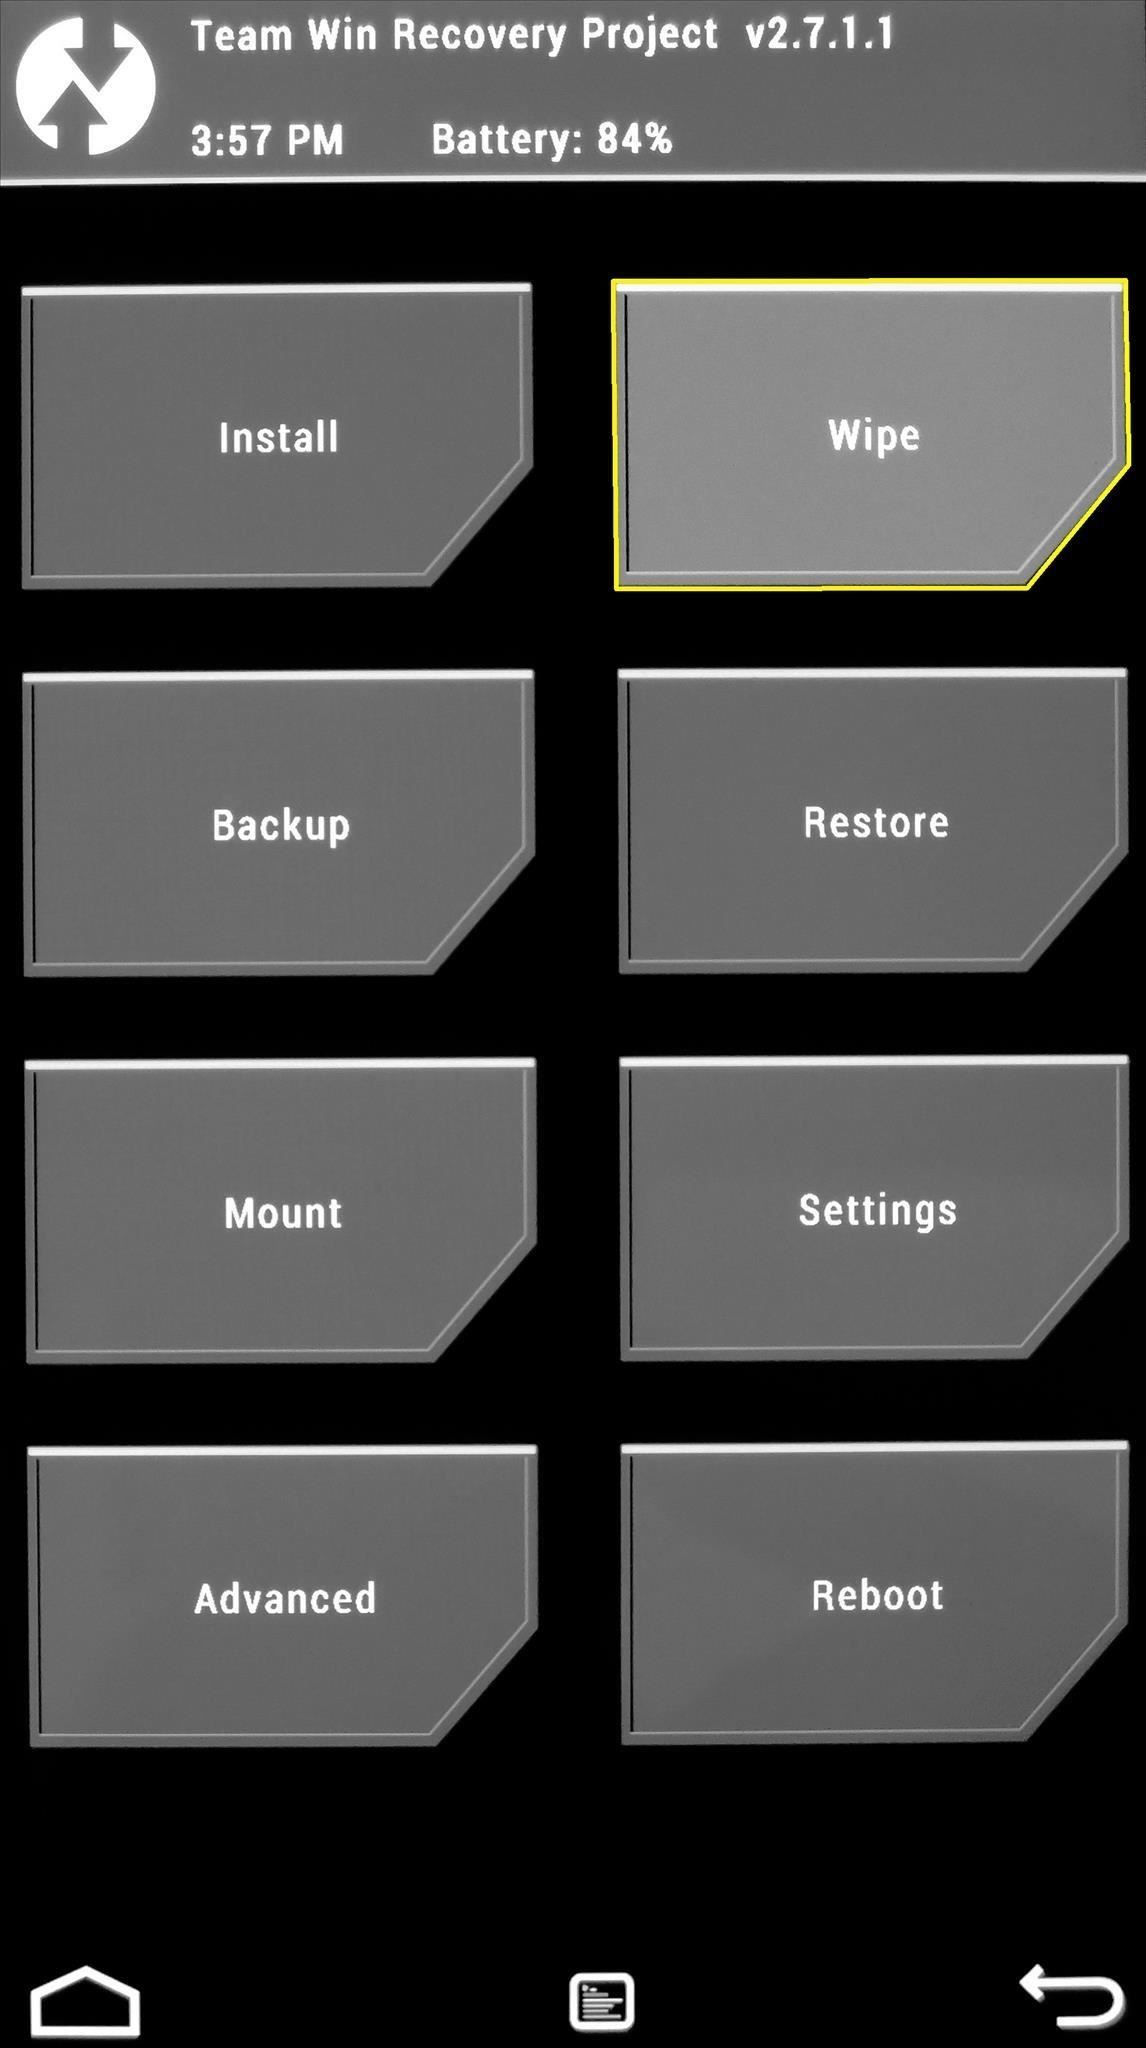
Tip #5. Wiping Existing DataWhen using TWRP to install a new ROM, it's a good idea to wipe the existing firmware to give the new system a clean slate upon which to install.So before installing CyanogenMod, for instance, you'll want to wipe the stock firmware from your device so there are no conflicts. From TWRP's main screen, tap Wipe to begin. The preset wipe mode will work perfectly fine in most cases, so swipe the slider at the bottom to perform the wipe. If you're experiencing bugs and you want a completely fresh start, or you just want to be entirely sure there's no preexisting data left to cause conflicts, you can use the Advanced Wipe feature from the same screen. From here, just tick the boxes next to Dalvik Cache, System, Data and Cache, then swipe the slider at the bottom to perform a full wipe.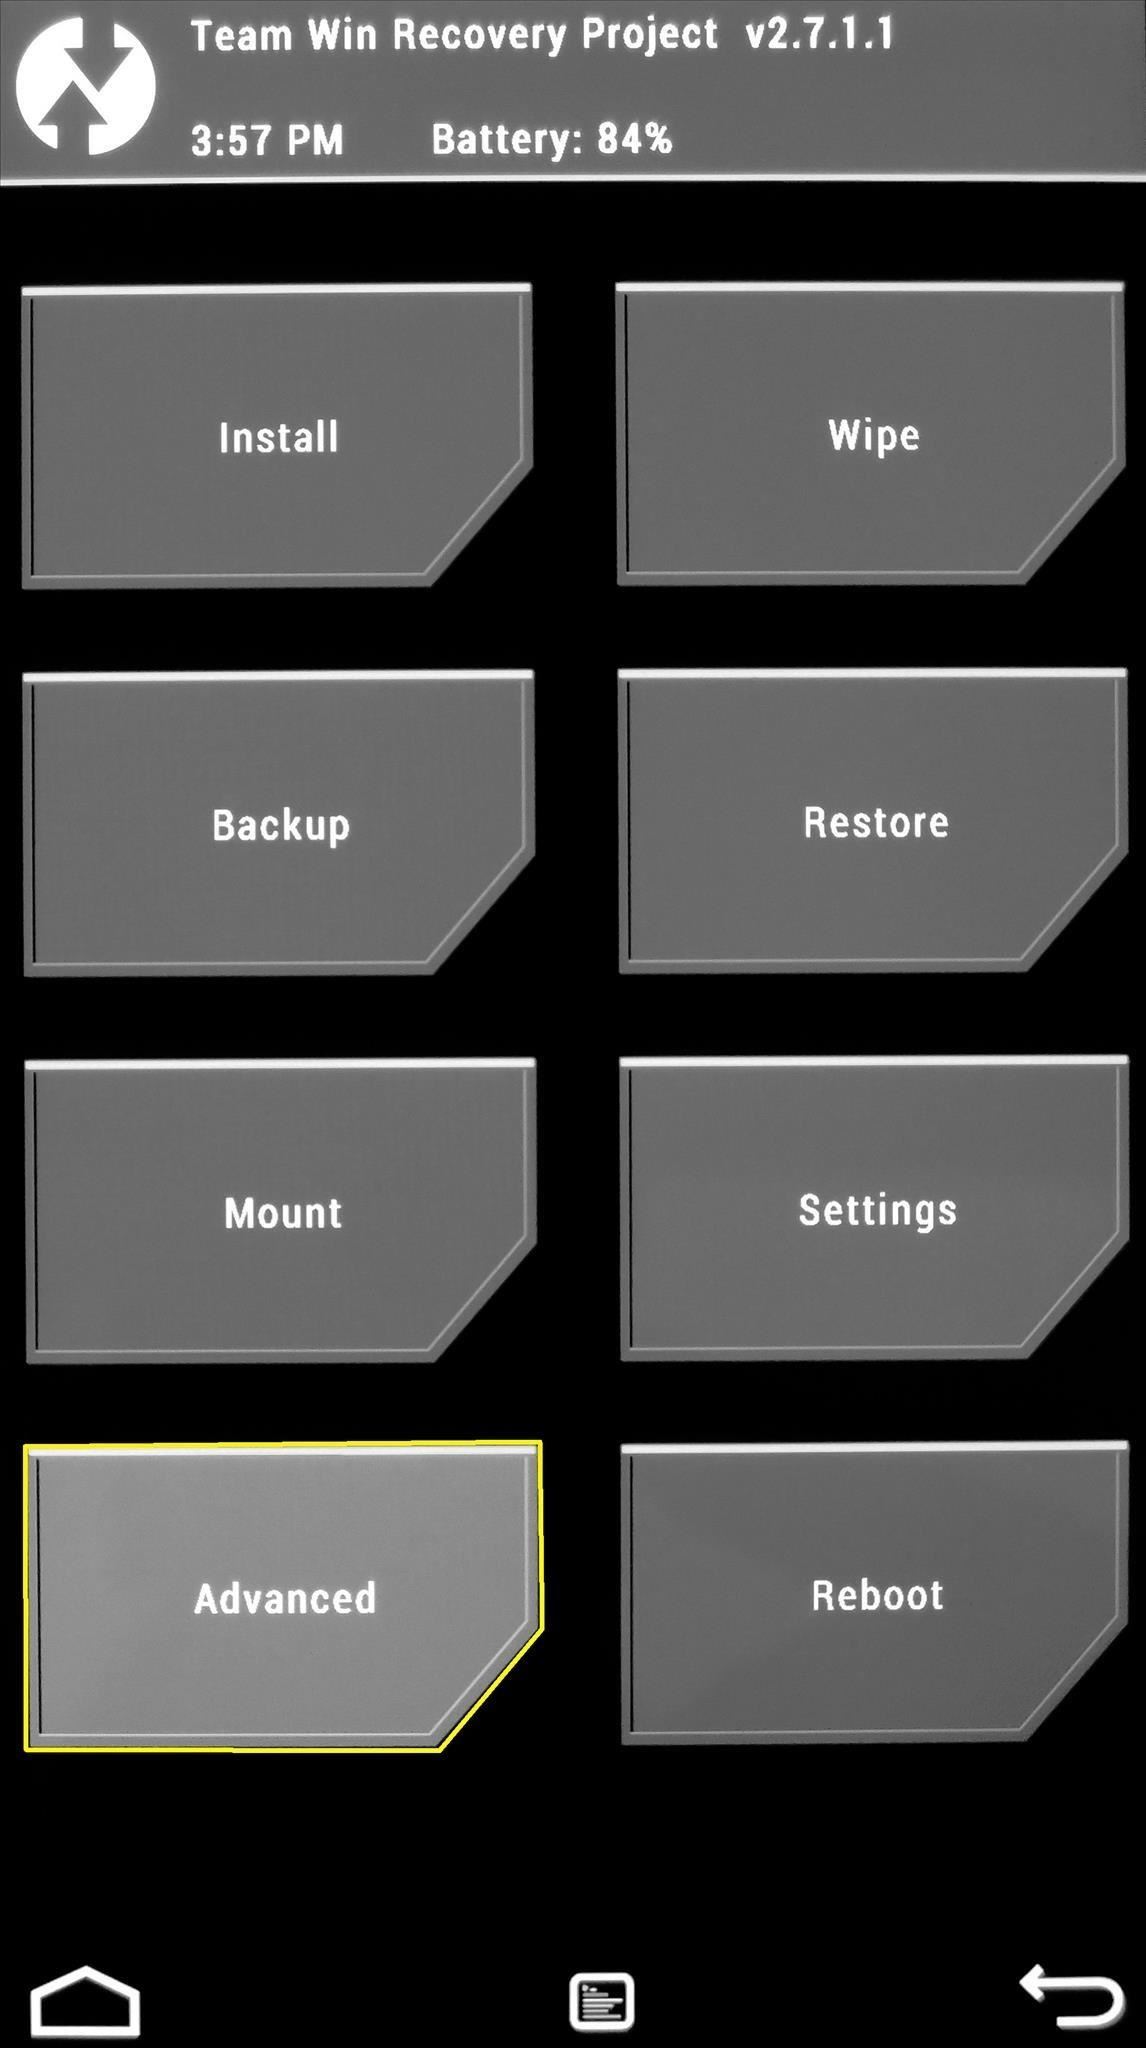
Tip #6. Fixing PermissionsSometimes, flashing mods and installing root apps can cause Android to sorta "forget" what permissions various apps had to begin with. System-level apps need their permissions set a certain way to perform correctly, so you could end up with minor bugs and force closes after installing a hack.If this ever happens, you can easily reset all apps on your device back to their proper permissions using TWRP.From the main screen, tap Advanced, then choose Fix Permissions from the following menu. Then just swipe the slider at the bottom and all of your apps will automatically be given the proper permissions for their respective folders.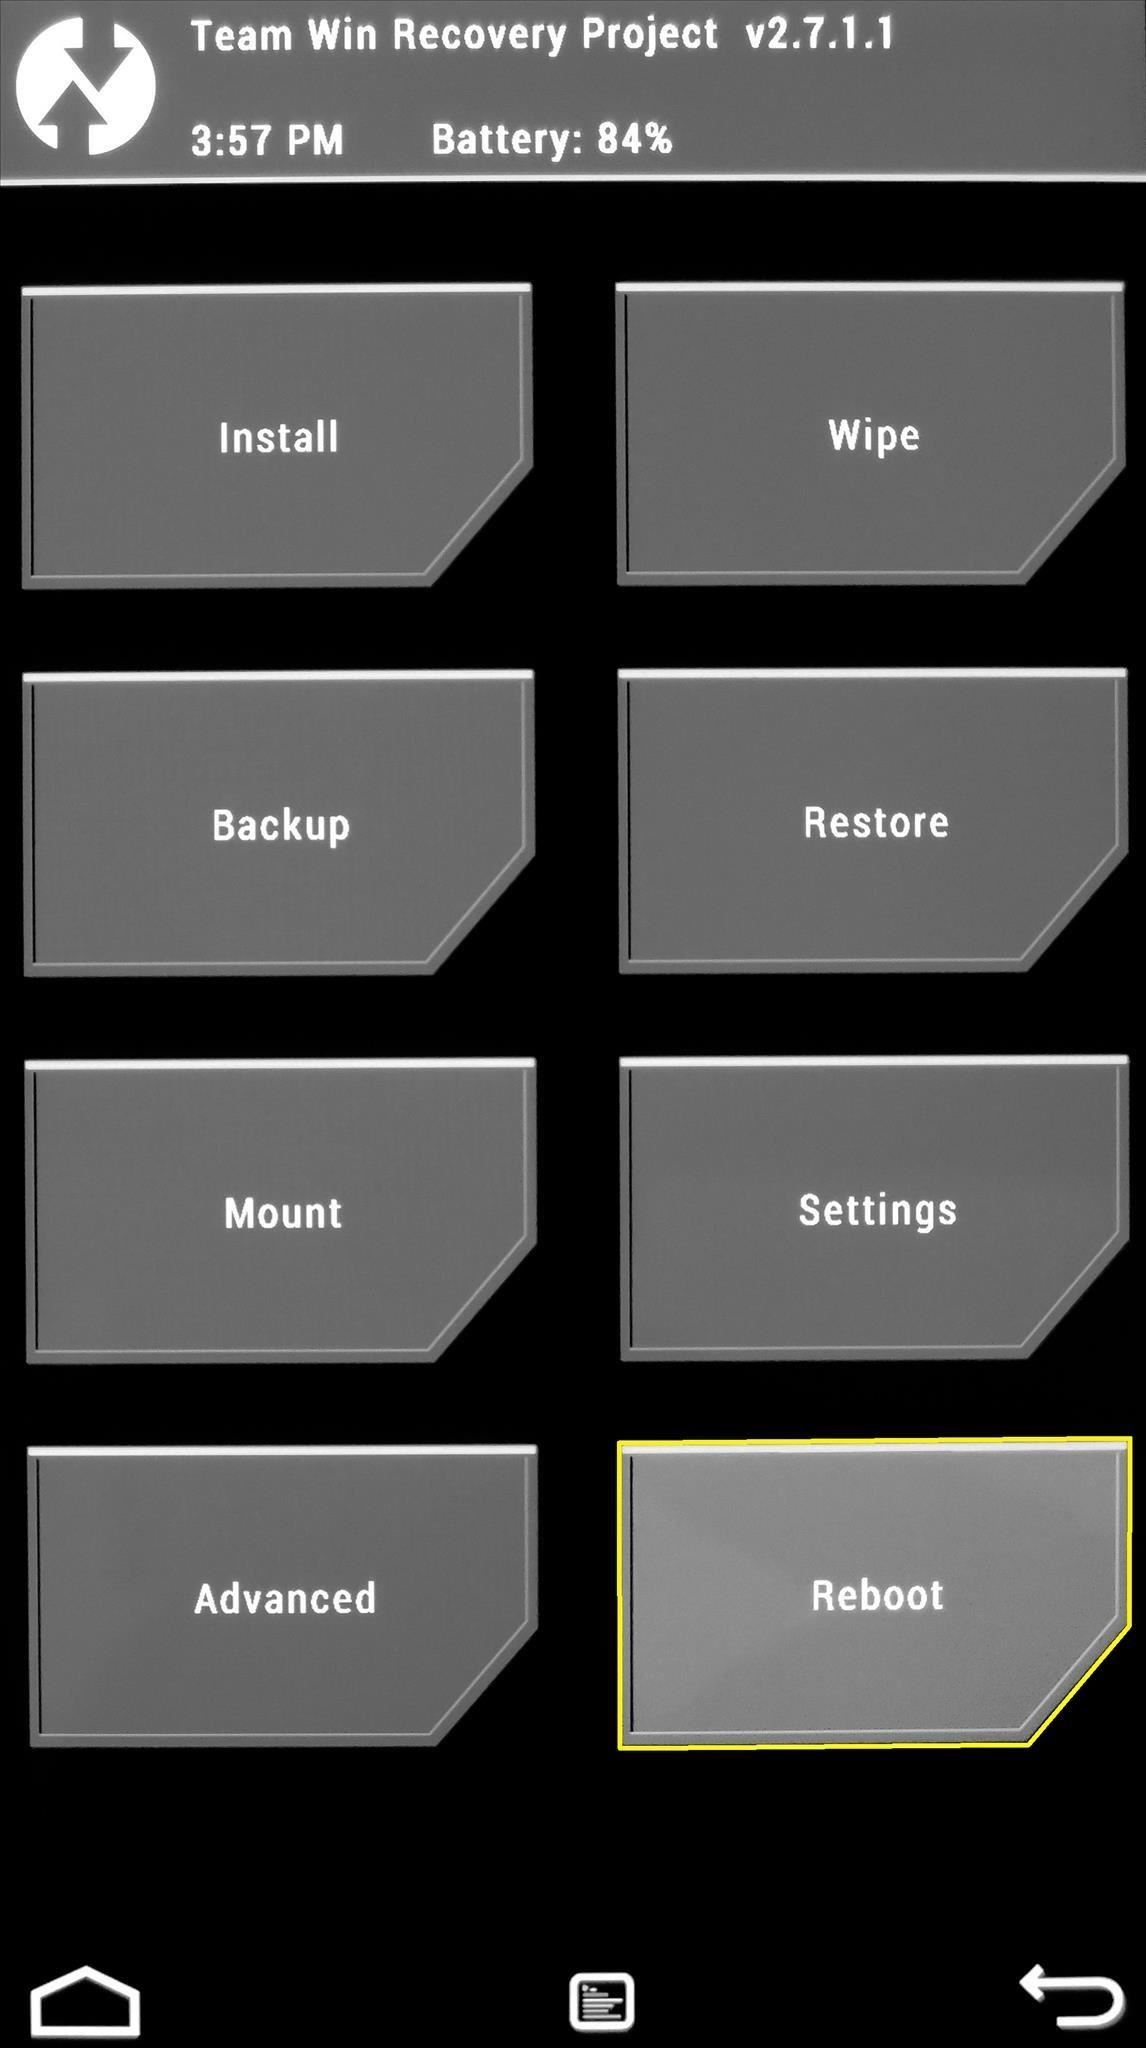
Tip #7. Booting Back into AndroidTo get out of TWRP and back into Android, start by tapping the Reboot option from the home screen. On the next menu, simply tap System to boot back into Android. I hope this guide helped you get to know TWRP, because there are so many powerful things it can do. If you have any questions, post them in the comments section below and we'll be sure to answer them.
Swiping to the right on the lock screen will reveal the Today view. This is where you can interact with widgets, ranging from what's next on your calendar, Activity app stats or sports scores.
Sports: Latest News, Photos, Videos, Info, Buzz and more
The 5 Best Phones for Social Media Addicts « Smartphones
The Android version of Google Chrome only shows a home button on some devices. Unfortunately, this feature isn't available to all Android phones due to several factors. But thanks to a simple workaround, you can now enable this button and set a home page regardless of what device you have. A number
Play the hidden T-Rex Dinosaur game of Chromium
How to Unlock a Samsung Galaxy. This wikiHow teaches you how to carrier-unlock your Samsung Galaxy smartphone. Carrier-unlocking your phone will allow you to use it on any carrier's network as opposed to just the carrier from whom you
Protect Individual Apps on Android That You Can Only Unlock
Updated: May 31st, 2019 How to Set Ringtone on iPhone without GarageBand and iTunes If you ever get stuck with iTunes or Garageband - this guide is for you! 🔥 Learn how to set ringtone on iPhone without Garageband or iTunes.
How To Hack An iPhone Free Without Jailbreak 2019 [iPhone
More and more Internet connections are being filtered, from public Wi-Fi and workplace connection filtering to ISP and country-level censorship. However, there are still ways to get around this filtering and view blocked websites. Some of these methods may be restricted by harsh filtering.
9 Easy Ways to Bypass a Firewall or Internet Filter - wikiHow
Instructables user vmspionage demonstrates how to make a tiny bbq grill with an Altoids tin "powered by a standard-sized charcoal briquette and capable of cooking a full-size hot dog (cut down to size) or smaller hamburger patties with ease."
Altoids Portable BBQ !!: 11 Steps (with Pictures)
Since the feature is still in testing phase, it's not available to the public yet, but there's a cheeky way to enable it on your device right now. So, if you are interested in using dark mode on Messenger on Android or iOS, here is how to enable the hidden dark mode: Enable Hidden Dark Mode in Facebook Messenger
How to Enable the Hidden Dark Mode in - lifehacker.com
How to stop Dog Anxiety, Aggression, Pulling on the leash! German Shepherd Training Full tutorial - Duration: 20:10. Upstate Canine Academy 538,557 views
Amazon.com: Guard Dog: Alexa Skills
I am starting to learn Ruby and having a hard time running the Ruby classes in the Terminal. I created a class in the Sublime Text editor, just "hello world". I can compile using ruby hello.rb, but how do I execute it? I went to the terminal in my root directory and typed rails c which gave me a console. Could some one please tell me how to
Creating and running your first Ruby project - Help | RubyMine
Learn tips on how to save a wet cell phone. any remaining moisture by submerging the phone in a bowl or bag of uncooked white rice and/or silicants freeze the phone to fix
How To Fix A Wet Phone With A Trick Better Than Rice - Simplemost
How To: Open Your Favorite Android Apps with a Flick of Your Wrist How To: Launch Apps & Custom Actions with Screen-Off Gestures on Android How To: Enable the New Multitasking Swipe Gestures in Android 9.0 Pie How To: Get Oreo's Simpler Split Screen Mode Back on Android Pie
How to Add Customized Gesture Controls to Your Android Phone
FREE LIVE TV Kodi add-on How to install Free Live Tv 100% safe & legal Kodi add-on guide Free Live TV is powerful Kodi add-on that has been adding new channels to its repertoire steadily since it was released. Add-on community support group for Free Live Tv can be found on Twitter, which you should follow, to keep on top of updates and news.
Kodi 101: How to Get Free Live TV Legally « Smartphones
Most of wireless charging products are based on Qi technology nowadays, but not all phones and devices are made with Qi built-in. if you want to know if your device is Qi compatible, or if you want to buy Qi compatible devices, the list below will help you.
IQ Test - How smart are you? - Apps on Google Play
If you add a video to your Instagram Story, for example, it'll play for up to 15 seconds, regardless of how long the original video was, and then end. Despite Instagram Stories' 15-second runtime limit, there are ways to play longer videos in your Story.
How to Add Text in Instagram Stories - YouTube
0 comments:
Post a Comment