How To: Root Android LThe Easy Way
While the preview images for Android's upcoming "L" release just came out yesterday, the new firmware has already been rooted, as is standard with its openness. So if you were feeling reluctant to try Android L because it didn't support existing root methods, then you might want to reconsider.One thing you should know up front is that, while root works perfectly on Android L, some root apps (like Titanium Backup) have not been updated to support the new SELinux kernel module in the new version of Android, while others (like Xposed Installer) do not yet function on L's new runtime, ART.After a brief hiatus, developer Chainfire has burst back onto the scene and updated his SuperSU ZIP to get root working on Android L. As a result, we can now enjoy root privileges on our Android L devices. Please enable JavaScript to watch this video.
This method will work on both the Nexus 5 and the 2103 Wi-Fi Nexus 7.
What You'll NeedNexus device with Android L (check out our install instructions using either Windows or Fastboot for help) Windows PC (sorry, Mac users)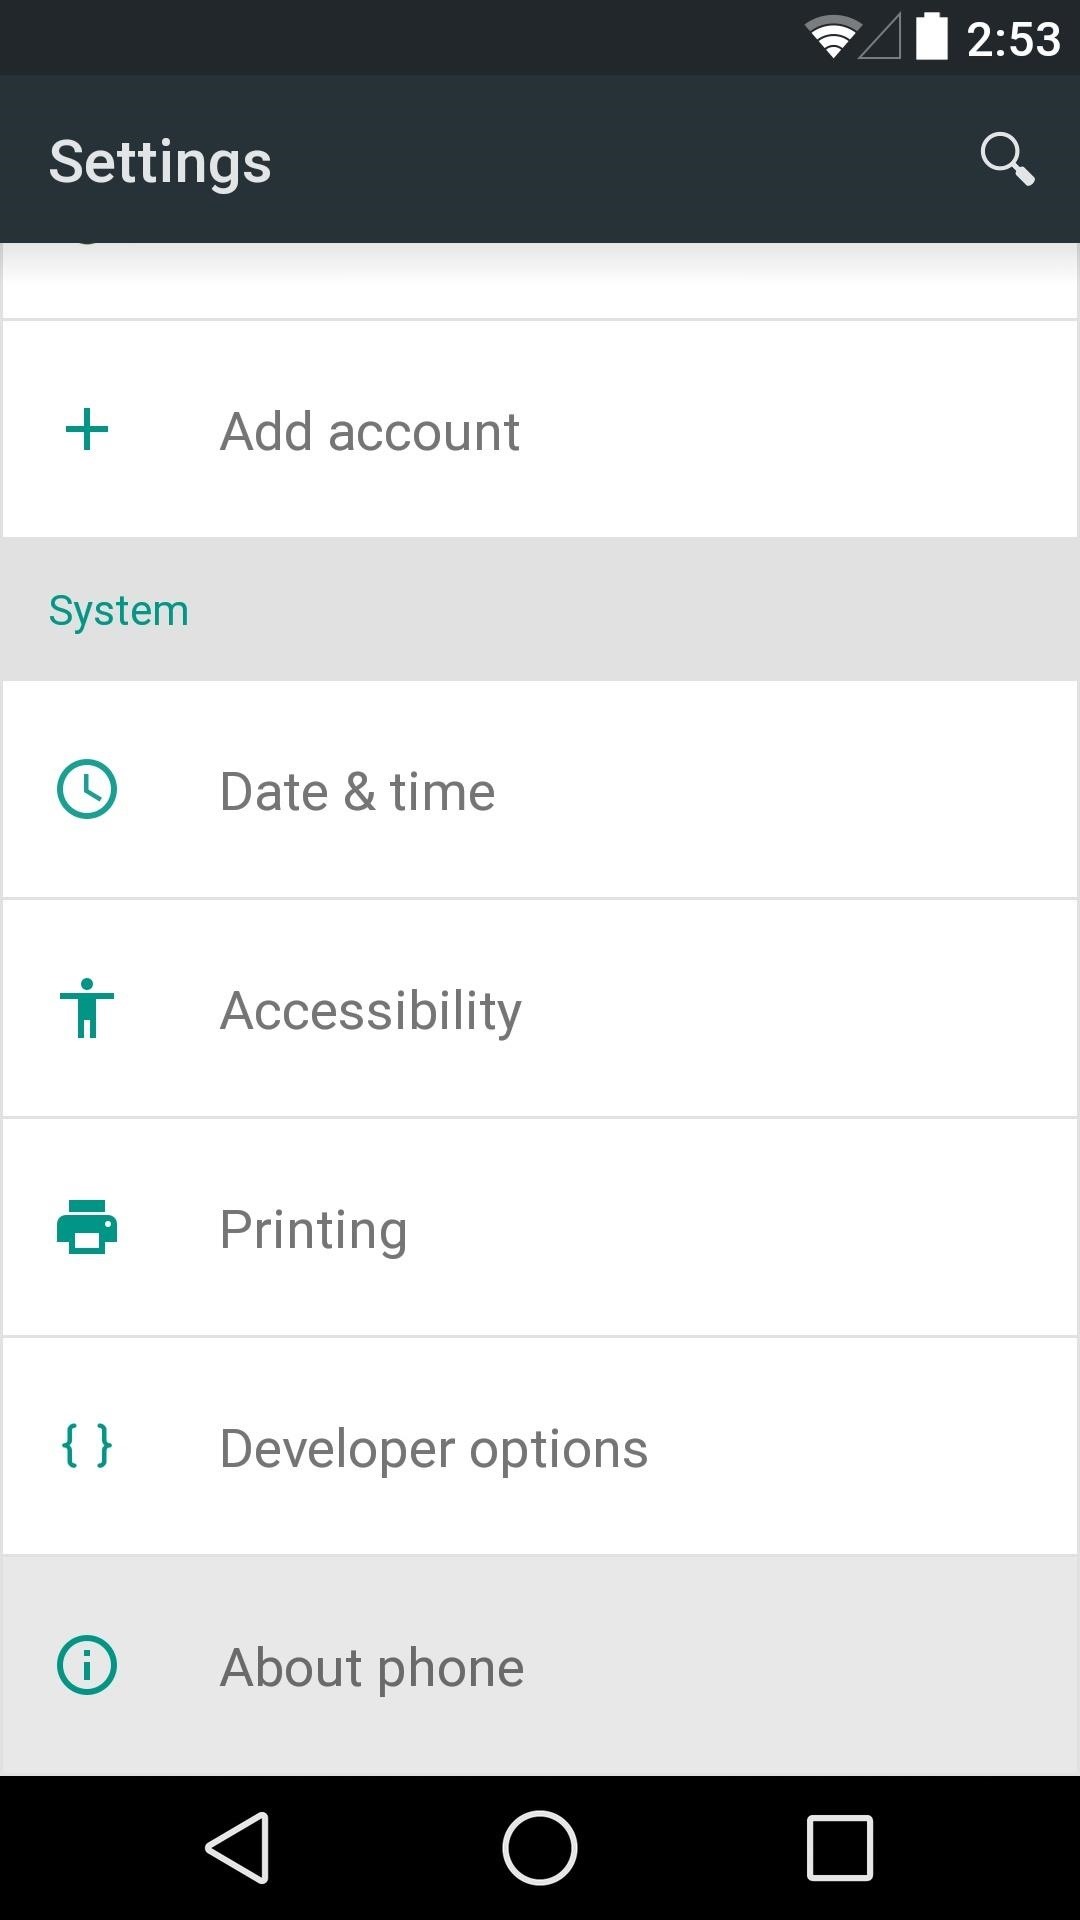
Step 1: Enable USB DebuggingYou already did this once when you installed Android L, but the process of installing the preview images wiped all existing settings on your device, so you'll have to do it again.Start by heading to Settings, then scroll all the way to the bottom and tap About Phone. In here, scroll down to the bottom again and tap Build Number 7 times. You'll see a toast message that says You are now a developer. Now, back out one level and you'll see a new entry for Developer Options. Head in here and tick the box next to USB Debugging, then press OK. At this point, go ahead and connect your phone to your PC using a USB cable that is in good condition.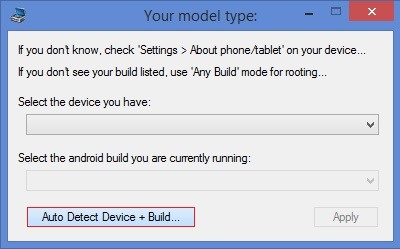
Step 2: Install Nexus Root Toolkit on the PCIf you used my Windows method and the Wugfresh Nexus Root Toolkit to get Android L on your device, you should already have all the necessary software installed.If not, just head to this link from your Windows PC and download the installer file. Run the installer file and allow Nexus Root Toolkit to download any files that it needs.NRT will ask you to enter your device name and build number, but since Android L is not in the toolkit's library yet, just hit Auto Detect Device + Build. At this point, you should see a message telling you to enable USB debugging on your phone. We've already covered that in Step 1, but now you should see a message on your phone asking you to allow your computer to connect. Tick the box next to Always Allow From This Computer and press OK. After this, you should be taken into NRT's main screen. From here, click Full Driver Installation - Automatic + Manual to install the necessary device drivers. If you've already done this as part of installing Android L in the first place, you can skip directly to Step 3. On the next screen, click the Step 3 tab and see what it says for Recommended Solution. Click the corresponding driver solution below that and follow the prompts for installation.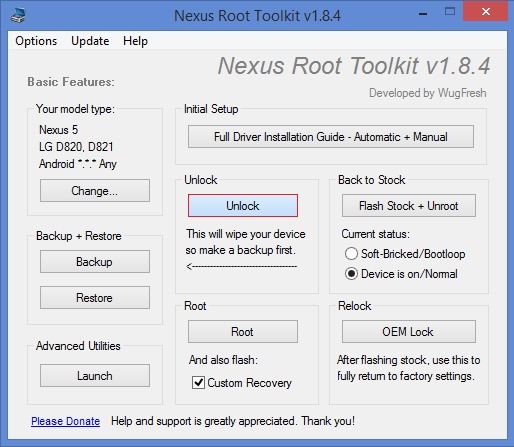
Step 3: Unlock Your BootloaderIn order to flash the SuperSU ZIP that will root Android L, you'll need to have a custom recovery installed on your device. But in order to install a custom recovery, you'll first need to make sure your bootloader is unlocked.Be aware that what little data you've accumulated on Android L will be lost when you do this, as will any apps you have installed, though those will restore once you've re-entered your Google credentials.From Nexus Root Toolkit, simply click Unlock to begin. Follow the prompts, and your bootloader should be unlocked within 5 minutes.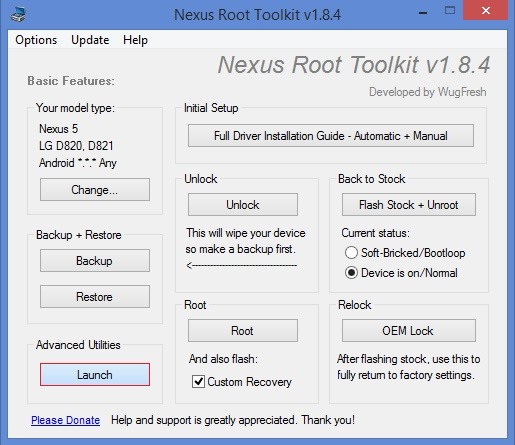
Step 4: Install a Custom RecoveryFrom NRT's main screen, click the Launch button in the lower left-hand corner. At the top of the middle column on the next screen, make sure Flash (Permanent) is selected, then click Recovery. Click OK on the following window, then you'll be asked to select the recovery you'd like to install. I'd recommend TWRP Recovery, as it has the best interface out of the options provided. Follow the prompts for installation, and when finished, you can exit out of NRT and disconnect your phone from your computer.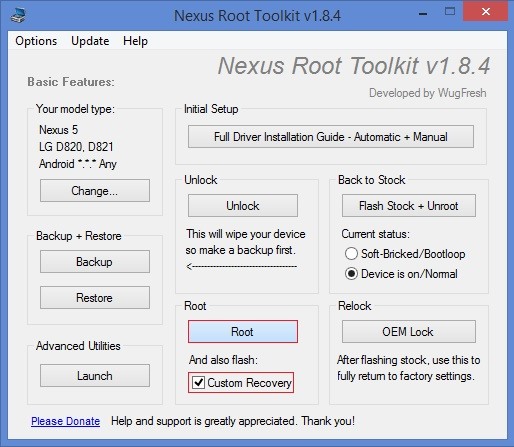
Alternate MethodIf you experience any difficulties with recovery installation using the method above (e.g., recovery not starting properly), there is a second method that you can use instead.Under the Root section of NRT's main screen, tick the box next to And also flash: Custom Recovery. Next, click the Root button. From here, just follow the prompts for installation until you arrive at this screen: Rather than installing the outdated SuperSU that the Toolkit is prompting you to flash, simply reboot your phone when you arrive at this step. From your Nexus, tap the Reboot button, then on the next screen, choose System. When your Nexus finishes booting back up, click OK on the dialog in NRT. You can exit Nexus Root Toolkit and proceed to Step 5 when you arrive at this screen: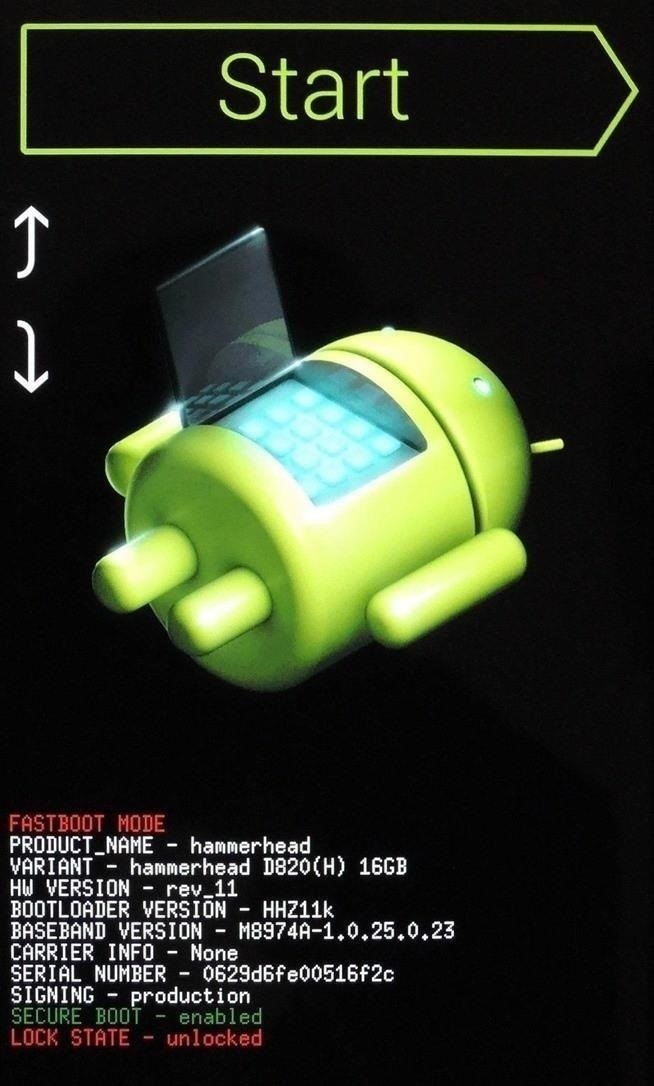
Step 5: Install the Modified SuperSU ZIPThe SuperSU ZIP that works with Android L can be found at this link, so just tap that to start the download on your Nexus.When the download is finished, you'll need to boot into recovery to flash it. Start by powering your phone completely off, then press and hold the Volume Down button. Next, press the Power button for a second or two, and you should be taken to Android's Bootloader menu.From here, press the Volume Down button twice to highlight Recovery Mode, then press the Power button to confirm your choice. This will take you into your newly-installed custom recovery. If you went with TWRP, just tap Install, then navigate to your Download folder and tap the Update-SuperSU ZIP file. Swipe the slider at the bottom to install, then hit Reboot System. When you get back up, you'll be rooted. Keep in mind that some root apps have yet to be updated to accommodate the recent ART and SELinux changes, but most work fine.What are some root apps that you couldn't live without? Do they work with Android L already? Let us know in the comments section below.
In this video, we learn how to build a portable personal heater. This is a great weekend project that is easy to make and will keep you warm during a freezing winter. You will need: two double a batteries, charger, twin double a battery charger, winding wire, and balsa wood. First, cut the wood the size of the battery holder and cut it out.
Build a portable heater - Survival Training :: WonderHowTo
Then, there's the VSCO X, a subscription-based app for more serious photographers who need more photo editing options. Most VSCO presets use actual film stocks as inspiration. That's why VSCO filters look more authentic and vivid than Instagram's version. The app also allows you to change the effects and save your adjustments for future
VSCO App Tutorial: How To Shoot & Edit Beautiful iPhone Photos
That is how to copy, cut and paste on iPhone Xs, Xs Max and Xr. You can also paste a copied text Multiple times i. Different places. However, once you copy a new text the old one gets overwritten. Also, once you restart your device, any copied text gets wiped away so be sure to paste it somewhere else before you copy another text or restart
How to Copy-Paste Text from iPhone to Mac or Windows PC and
With a number of messages that we receive every day, it could be a serious challenge if we want to search certain information from text messages/iMessages on iPhone, especially when we need to find phone numbers someone texted to us.
[community/members/babblin5/ Babblin5] is a pioneer of such art, especially here with his Light Brite Frisbee. From his workshop in Kansas, he mods a traditional frisbee with a light-up yo-yo, delivering a very cool toy.
How to change LED light battery - YouTube
Universal Profile is a globally agreed upon standard for implementing RCS in a way that allows for subscribers of different carriers and nations to communicate with each other. Version 1.0 was released in November 2016 and allowed for carriers, OEMs, and Google to make the necessary implementation to their product or service for interoperability.
T-Mobile To Add Support For RCS Universal Profile | Digital
How to Unlock Bootloader :
If your haven't registered your iPhone to the Apple Developer Program, you'll need to this first to get the watchOS 2 Beta. To do that, you'll need to get the UDID of the device. Do this by connecting your iOS device to your computer, open iTunes and click on "Serial Number" underneath your phone number.
How to Install watchOS 6 Beta 1 on Apple Watch
If you simply opened the download without asking Firefox to save it, it's possible that you can still access your file (if you did not close Firefox in the meantime). Files are are opened and not stored, are temporarily placed in a cache folder so you can use it while your Firefox session lasts.
7 ways to make your PC look like a Mac. we prefer RocketDock's look and feel, and the fact that there's no charge for extra applets. Widgets for a more colourful, Apple Dashboard-like
How to Make a Windows Computer Look Like a Mac: 9 Steps
We would love to know about the apps you use to automate your Android device? Do you use Tasker? If you do, and if you have some cool Tasker Profiles that you think will prove useful to others, feel free to share them with us in the comments section below. Image Courtesy: The Verge
Tasker 101: 5 Useful Profiles to Help Get You Started with
How to See Active Network Connections (Windows). You may find yourself needing to check your current network connectivity when using your Windows computer. There are a few simple methods that you can use to accomplish this.
How to Show Network Icon on Taskbar in Windows 7, 8 or 10
If you have trouble seeing your iPhone or iPad's screen, VoiceOver is there to help! It reads out just about everything on your screen for you and uses different gestures to make things easier. Here's how to use VoiceOver!
iOS 10: Where's Slide to Unlock? How to - OS X Daily
osxdaily.com/2016/09/15/disable-press-home-to-unlock-ios/
Instead if you slide right on the lock screen of iOS 10 you end up in the widgets screen. Replacing that old familiar gesture is a new Press Home to Unlock maneuver. The Press Home to Unlock move means you literally are pressing on the Home button to trigger the passcode entry screen or Touch ID.
0 comments:
Post a Comment