How To: Replace Video Backgrounds with the Green Screen Chroma Key Tool in Enlight Videoleap for iPhone
Using a green screen is an affordable and easy way to transport your video to anywhere imaginable, even to places that don't exist. You can use it to sit behind a desk in a busy newsroom or dance on the moon, but first, you have to know how to properly perform chroma key compositing two videos together. Fortunately, Enlight Videoleap on iOS makes it easy.Chroma keying is when you combine two images or videos together, compositing them together based on color hues. The top layer will have portions that are "green screened" (or that use a different flat color). Those portions, whether the entire background or just a small spot covering a TV screen, will be replaced by what's in the bottom video layer. This allows filmmakers to transport subjects into completely different worlds, "air" specific video content on screens, and more.You no longer need powerful desktop editing software to combine green screen footage with your background footage — your iPhone is more than adequate to get the job done. And Videoleap's chrome key feature can help you blend together two images or videos in seconds. You can use your own green screen and background footage or you can play around Videoleap's stock footage to test it out.
Step 1: Add Green Screen + Background VideoFirst, before going any further, make sure you've updated "Enleap Videoleap Video Editor" on your iPhone. Then, open it up, and start by finding both a green screen video and a video that you want to play in the background.We're going to show you three different methods on how to add the two videos together in your Videoleap project. For Method 1, we'll add the background video first, then the green screen video, while in Method 2, we'll add the green screen video first, then the background video. In Method 3, we'll add them both separately then combine them after.All these methods work, but the second and third ones will automatically format the background video to the size of the green screen video (if the same aspect ratio), which is useful if you don't want to change the size of it.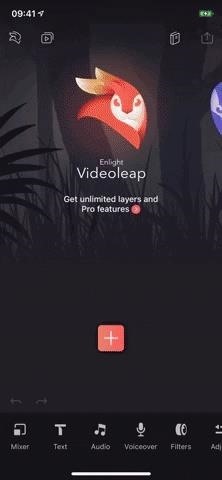
Method 1: Adding Background, Then Green Screen VideoIn the timeline, tap on the red-and-white plus sign, and find a video that you want to be in the background of your green screen video, meaning it appears in place of the green screen. You can search through your "Camera Roll" or any of the albums in your Photos app, in your Files app, or via stock footage provided by Videoleap and others (some is not free).After you add a video to the timeline, tap on "Mixer" in the bottom left, in the toolbar. Now, either upload a green screen video from your albums or find a free green screen video from the stock section. After you tap on it, the green screen video will be placed over the video already in your project, starting at wherever the playhead is at.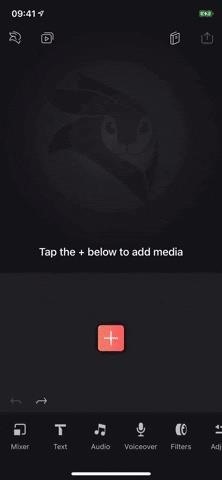
Method 2: Adding Green Screen Video, Then BackgroundThis is similar to Method 1, but after you tap the red-and-white plus sign in the timeline, you select a green screen video first. After that, tap on the green screen clip in the timeline to highlight it, then scroll through the toolbar at the bottom, and tap on "Mixer." Your green screen clip will shrink up to the top layer in the timeline.Next, tap on the red-and-white plus sign button that appears underneath the green screen layer, then find and select the background video you want. No matter where the playhead was placed, the background will appear in the timeline starting at the same time as the green screen clip.
Method 3: Adding Background & Green Screen Video SeparatelyThe third way is pretty simple. Just tap the red-and-white plus sign in the timeline, then select either your green screen video or your background video. Once it's in the timeline, tap the red-and-white plus sign again to add the other video.Once they are both in the timeline on the same layer, tap-and-hold on the green screen clip in the timeline until the clip becomes a little box, then drag it upward a tiny bit until it opens up the top layer and the square becomes an upside-down teardrop, then drag it over top the video you want to composite it with and let go.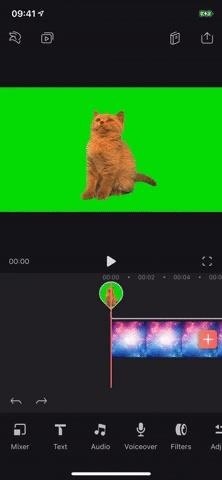
Step 2: Replace the Green with the Background VideoNow that your two videos layered in the timeline, make sure the top green screen layer is highlighted (if you used Method 1 or Method 3 above, it will already be highlighted), then tap on "Chroma" in the toolbar.The color "Picker" tool will be selected, and you need to tap-and-hold on the circle icon in the video, then move it until the crosshairs are in the green screen area. The green screen area will instantly disappear, replaced with the background video.You have two tools to edit the composite: "Threshold" and "Spread." Use "Threshold," which is set to 25 by default, to refine the edges of the object(s) from the green screen video; Increase it to make the objects more refined. Use "Spread," which is 0 by default, to configure the opacity of the on-screen objects; If you increase it too much, the green area will start to show up. If you're not happy with the green screen results, you can use "Reset" to start over.Once you're set, tap on the grey area in the timeline or the back button in the toolbar to exit the chroma keying tool. Then, you can tap on the green screen video clip to edit the size and placement of the foreground, if needed. Once the red lines appear around the video, pinch in to make it smaller or pinch out to enlarge it, and drag and drop it to where you need it. If you don't need to make any other adjustments (see Step 3), tap on the Action (aka Share) icon in the top right, then the "Save" button to download it to your device. You can adjust the resolution and frames per second before doing so. Below is the end result of the two videos blended together above.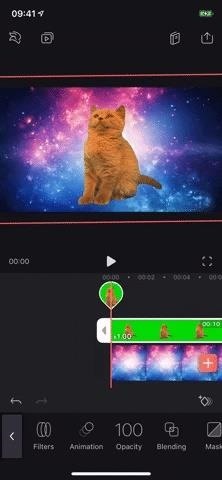
Step 3: Adjust the Layers in the TimelineIf you're satisfied with how your green screen clip looks, it's time to make further adjustments, if needed. To move it to a later part of the background video, simply tap-and-hold the middle of the green screen layer in the timeline, then drag it to the position you want.To shorten the green screen clip, tap-and-hold either end of the layer, then slide inward to where you want. And to delete either the green screen or background layer, tap-and-hold on it, then slide it down onto the trash can icon that appears. If you want to adjust brightness, contrast, saturation, exposure, and other aspects of either the green screen layer or background layer over time, use the "Keyframe" tool (the diamond icon with a plus sign that appears above the toolbar on the right) to create animations in specific sections of the video. You can use it to add fade ins and fade outs, too, but there are dedicated tools for that in the "Animation" section.This article was produced during Gadget Hacks' special coverage on smartphone-based video creator tips for filming and editing. Check out the whole Videography series.Learn How: How to Use Keyframes to Animate Effects & Create Custom Transitions in Enlight Videoleap for iPhoneFollow Gadget Hacks on Pinterest, Reddit, Twitter, YouTube, and Flipboard Sign up for Gadget Hacks' daily newsletter or weekly Android and iOS updates Follow WonderHowTo on Facebook, Twitter, Pinterest, and Flipboard
Cover photo, screenshots, and GIFs by Nelson Aguilar/Gadget Hacks
Particularly, YouTube fans are more favored to upload HD video to YouTube, attributing to its super-high definition and faithful quality. But for HD videos, the problem is HD option increases the size of videos, though it has startling clarity, with the quality more faithful to the format in which it was originally recorded.
Upload videos - Computer - YouTube Help - Google Support
Replace Android's Voice Dialer with Google Now for Better
How to Hide Text Previews for Every App Notification on iOS 11's Lock Screen page to find Show Preview settings for that specific app. option to remove notifications history from popping
How to customize notifications on iPhone and iPad | iMore
Step 2: Choose a Custom Action. After installing Now Gesture Tweaks, go ahead and launch the app. By default, it's set to do nothing when the Google Now gesture is performed, but if you'd like to change that, tap the "Select Action" button.
Open Links in Different Browsers with Gestures on Android
We are going to show you how to take part in web chat without causing undue offense. A twelve step guide to Internet chat room behavior ranging from creating a persona, clarity, grammar, web abuse, and the safety element. Behave in Internet chat rooms.
How To Behave In Internet Chat Rooms - video dailymotion
Use a camera app that allows for locking focus, I use ColorOS camera app as it is very easy to lock exposure and focus during recording just by holding your finger. Don't be afraid! I know it can seem a bit daunting recording things with your phone in front the public but just ignore them because they really don't care.
10 tips to record better video on Android - YouTube
How To: Tint the Status Bar to Blend in with Different App Colors on Your Samsung Galaxy Note 2 How To: Give Your Status Bar Stock Android's Material Design Icons & Matching Colors How To: Give Your WhatsApp Status Message a Makeover with GIFs, Photos & Videos
statusbar - How to change the status bar color in android
How To: Bulk Install Apps on a New HTC One App Data on Your HTC One or Other Android Device Device Can Help Save Lives While You Sleep:
These 4 Apps Can Help Cure Your Smartphone Addiction
Do you notice that you turned off the music player, but the music player stays on the iOS 11 lock screen? It takes up most of the iPhone lock screen space and you can not get more notifications from other apps. So how to stop the music player banner app from showing up in the iPhone locked screen? Many users choose to force close the Music App
iPhone 7/8 : Remove music app from lock screen iOS 11
WiFi, either in airports, restaurants, coffee shops, schools, universities or even at home, would be coded to block certain websites. Unfortunately, in many cases, the block can only be removed by the administrator, but in other cases, there are some ways to bypass the block.
Automatically Change Keyboards for Specific Apps on Android
But the dust rating isn't the issue -- the water rating is. A water rating of 3 means that the Pixel is just barely waterproof -- it should be able to withstand "water falling as a spray at any
What to Know About the Waterproofing on Google's Pixel 2 and
The long wait for the more affordable iPhone XR is nearly over. Following its mid-September announcement alongside the flagship iPhone XS and iPhone XS Max, preorders for the $749 XR begin on
11 tips til at forudbestille en iPhone XR, XS eller XS Max
The Galaxy S8 Once Had a Home Button & It Looked Terrible
0 comments:
Post a Comment